How to Build a Container Image Running on Docker Hub.

I am a Cloud Developer documenting my cloud journey one day at a time.
In this blog post, I will guide you through the process of building a container image that runs on Docker Hub.
Additionally, I will explain what containers are, allowing you to establish a strong foundation in understanding how container images work.
By the end of this post, you will have a practical understanding of containerization, and be able to build your container images.
So, let's dive in and explore the world of container images
What is a Container?
Lucas Santos simplified Containers as a technology that allows us to isolate certain kernel processes and trick them into thinking they're the only ones running on a completely new computer.
This means you can have several containers running within a single OS without having several different guest operating systems installed.
Unlike a virtual machine, containers can share the kernel of the operating system while only having their different binaries/libraries loaded with them.
Some of the advantages of containers is the fact that they are smaller, faster, and more efficient.
It is also important to know that some of the popular machine repositories in the world are Docker Hub, Azure Container Registry and Google container registry.
What is an Image?
An image can be defined as a software package, for instance, an operating system. These Images are stored in what we call an image repository.
To get a machine image into our environment, we use a "PULL" operation. For instance, if we want to download redis. We input the "command docker pull redis" To start an image, we use the "run" command.
For more information on how to install docker engine in your Linux terminal see the steps here. To check if docker has successfully been installed, you can check with the command "docker -v"
Let's Get Started
Prerequisite: Ensure you have installed docker on your Linux terminal.
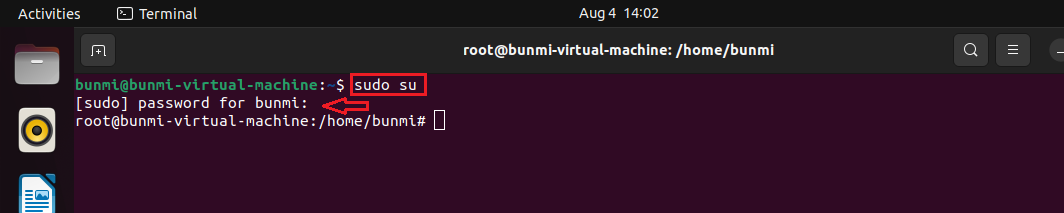
a) To begin, enter into root user with the command "sudo su" and press enter
b) Thereafter you are prompted to input your password, which doesn't reflect when you type it.
c) Having inputted your password, Press enter.
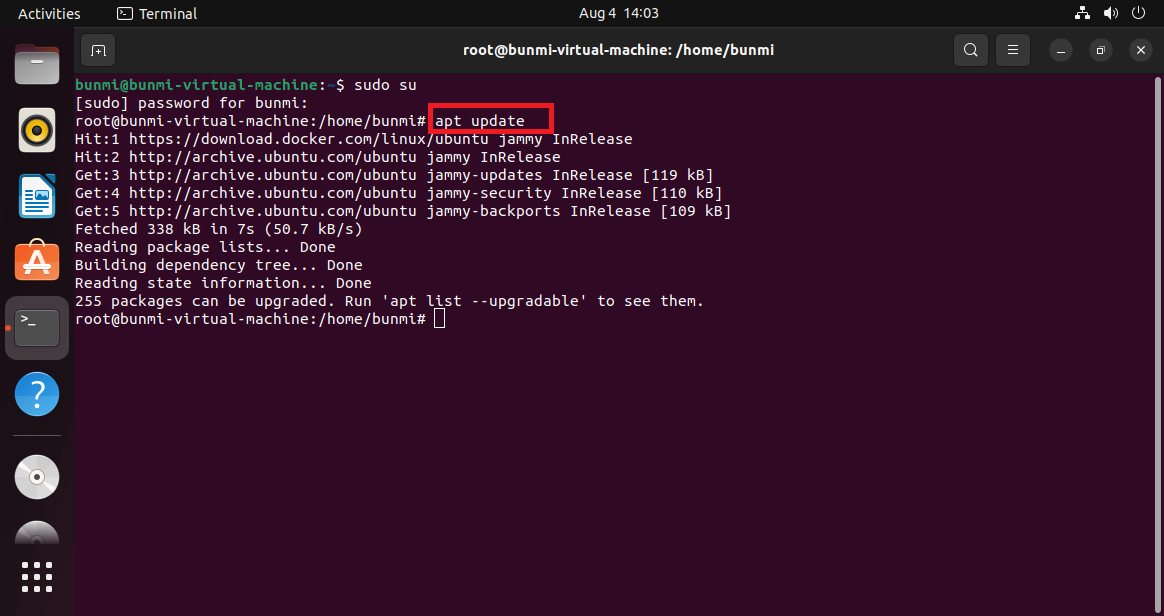
d) Input the "apt update" command to your system has the latest information about available software updates before performing any package installations or upgrades.
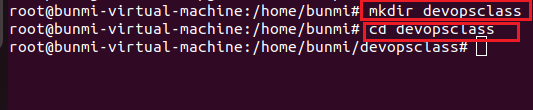
e) The next step is to create your directory with the command "mkdir", leave a space and give your directory a name.
f) To open the directory, input the command "cd", leave a space and type the directory name. Press enter.
g) To create our text file use the command "vi" for default or install "vim" for the latest version. Leave a space and name your text file.

h) Once you click on enter, the text file opens as shown in the capture below.
i) Click on the letter "I" on your desktop to enable you to type or insert your text in the space.

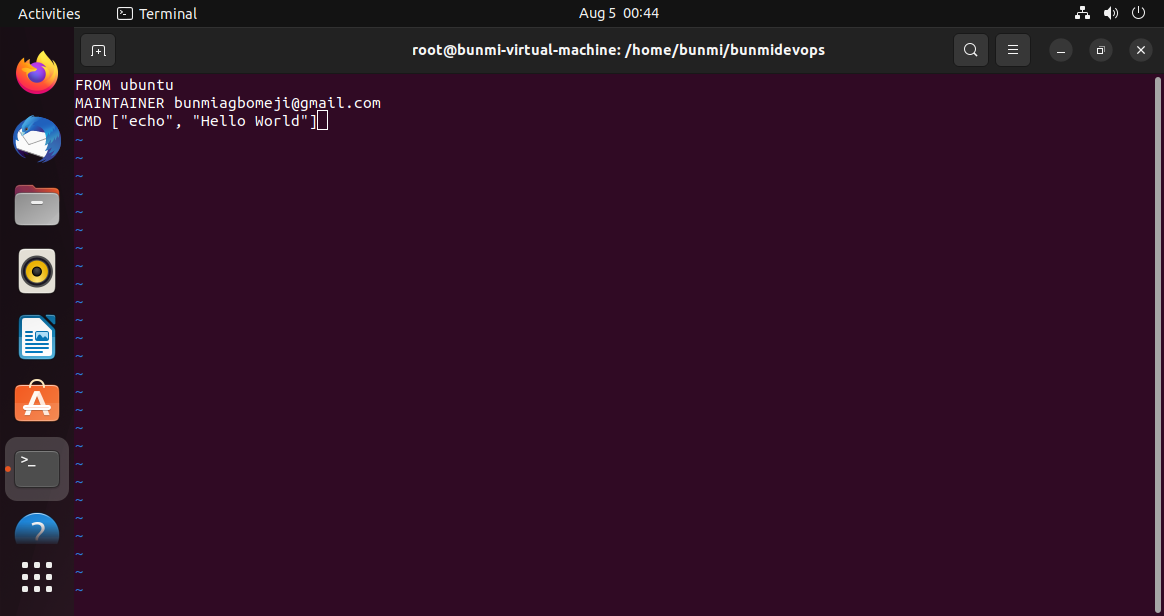
j) To build our container image, the first command is "FROM". It specifies the base image that will be used as the starting point for building our custom Docker image.
i) FROM ubuntu: The "FROM" command and the ubuntu base image name will be used to build our docker image. This means our Docker image is housed in the Parent image, called "ubuntu".
ii) "Maintainer" (your email): This command is used to specify the author of the image. Input this command, leave a space and input your email address
iii) CMD [ "echo", "Hello World"]
The"CMD" command is used to give an instruction.
In this demo, we are telling docker that when the container image starts, it should show the message "Hello World" by default.
k) To exit the text space,
i) press the ESC button on your desktop
ii) press the space button on your desktop
iii) input the ":wq" command.
This command is used within the Vim text editor to save changes to a file and exit the editor.

L) Having inputted the:wq command above, the text file page will close. You will be returned to your directory as shown below.

m) The next step is to build our container image.
n) Input the command "docker build -t mydocker ." Once you press enter, your container image starts to build.
o) Once its has finished building, you will see the "FINISHED" command

I hope this demo helped build your container image. Thank you.


