How To Add A Data Disk To A Virtual Machine And Initialise It For Use

I am a Cloud Developer documenting my cloud journey one day at a time.
In this tutorial, we will learn how to create and attach a data disk to a virtual machine. Furthermore, we will also remotely access the windows virtual machine and initialise our data disk for use.
It is important to know that there is a difference between an (operating system) OS disk and a data disk. Azure documentation explains that every virtual machine is equipped with a single (operating system) OS disk that is directly attached to it. This disk comes with a pre-installed operating system that was chosen during the creation of the virtual machine. It serves as the primary storage for the boot volume, essential for initiating the system.
While data disk is a managed disk that is attached to a virtual machine to store application data or other data you need to keep.
Lets Get Started........
a)The first step is to create our windows 11 virtual machine
b) To create your windows virtual machine see my blog on how to create a Windows 11 Virtual Machine.
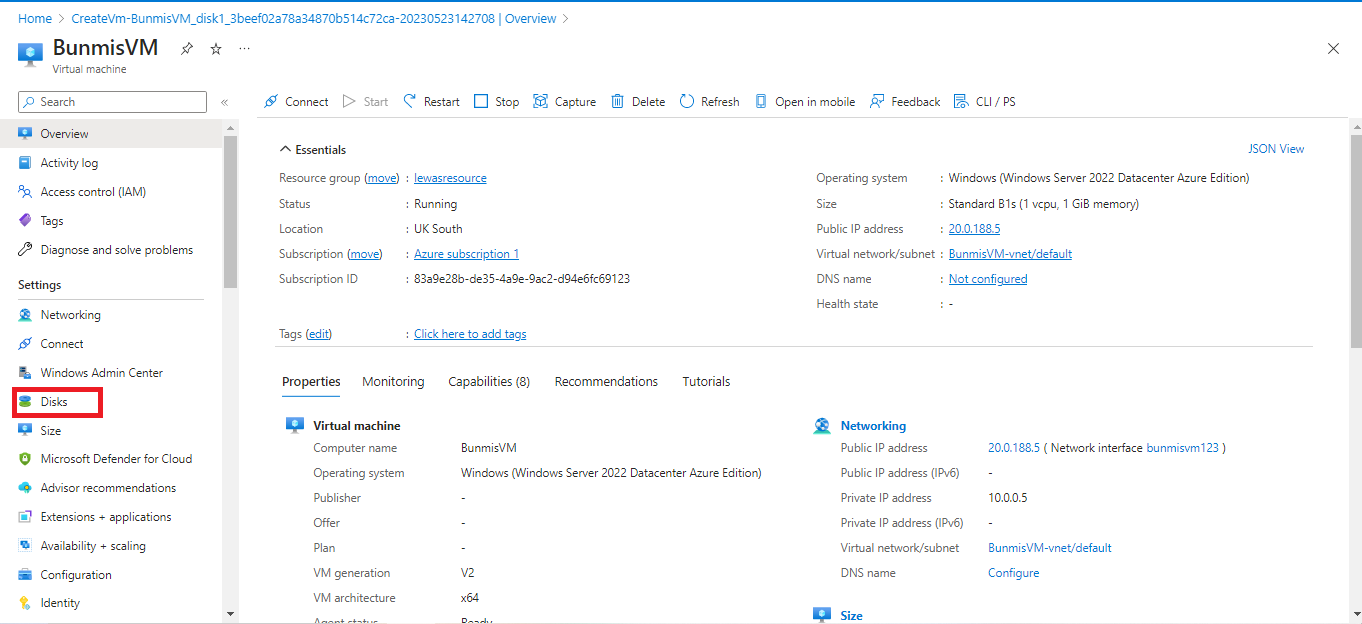
c)Once you've created your virtual machine click on it.
d) On the left side-bar click on "Disks".
e) Once you click on it, scroll down and click on create and attach a new disk.
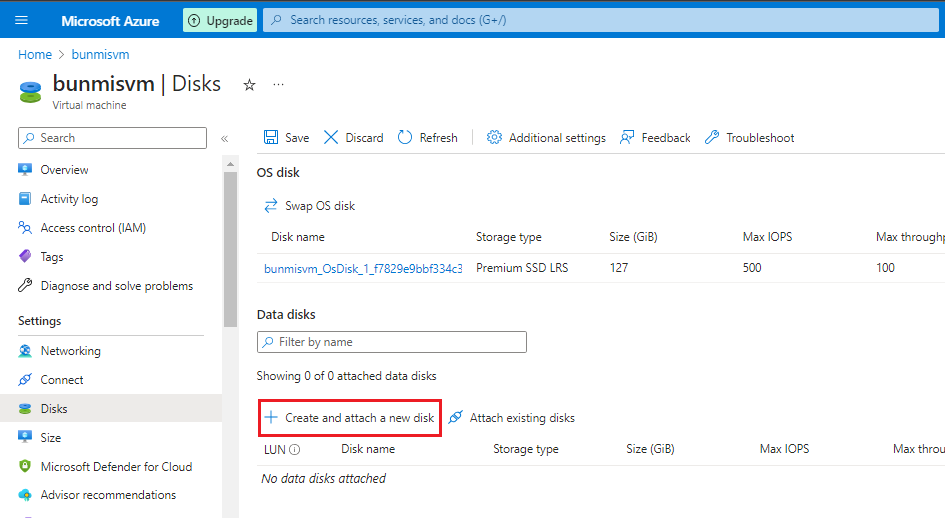
f)Give your new disk a name and leave the other information as default.
g)Click on save as shown below.

h)You can see that the (operating system) OS disk and data disk are two different disks.

Connect to your virtual machine and download the RDP file once you've downloaded follow the prompt, input your username and password.

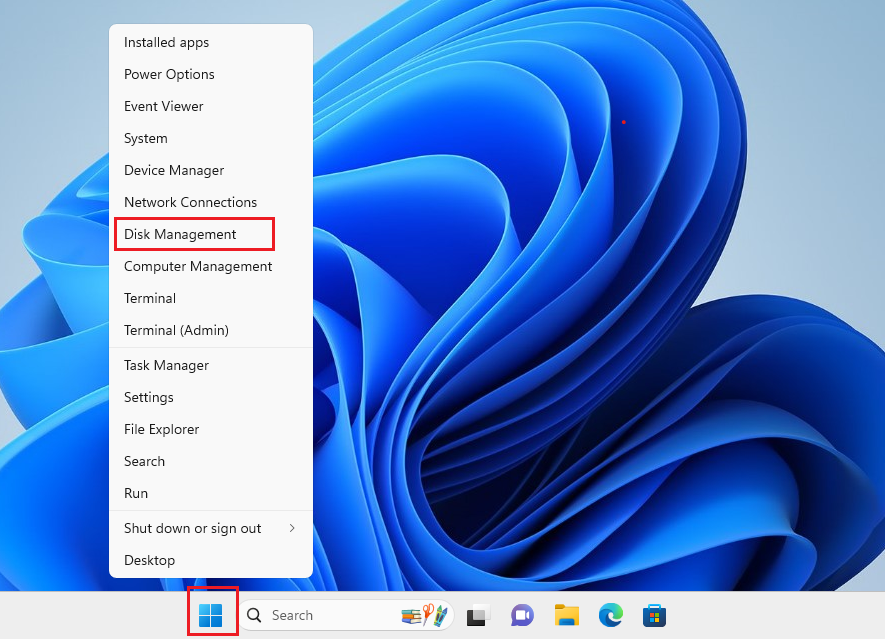
Now that you been able to gain remote access to your windows Desktop, right click on the Windows icon and click on Disk Management.
Right click on the disk 2 below.
From the drop down click on "new simple volume".

To continue click next on the new simple volume wizard.

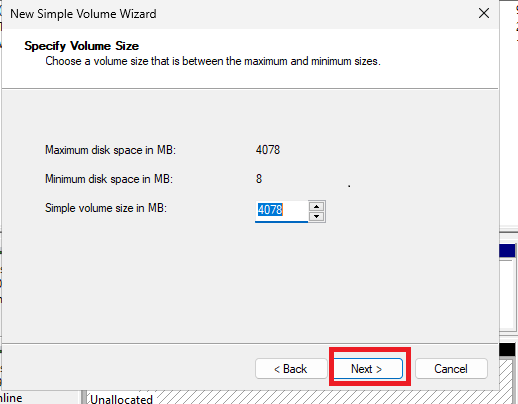
Click "Next" on the specify volume size.
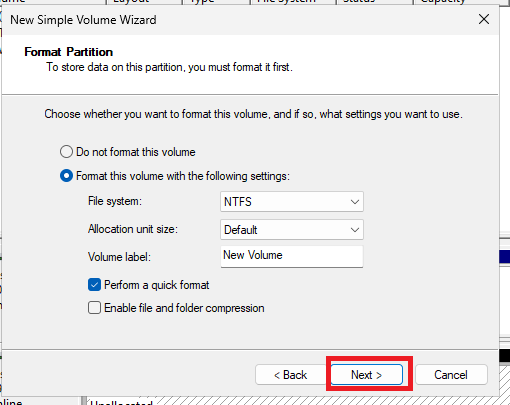
Also click "Next" on the Format Partition
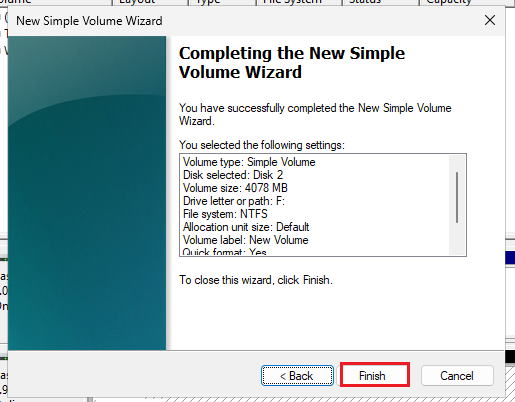
To close the wizard click "finish"
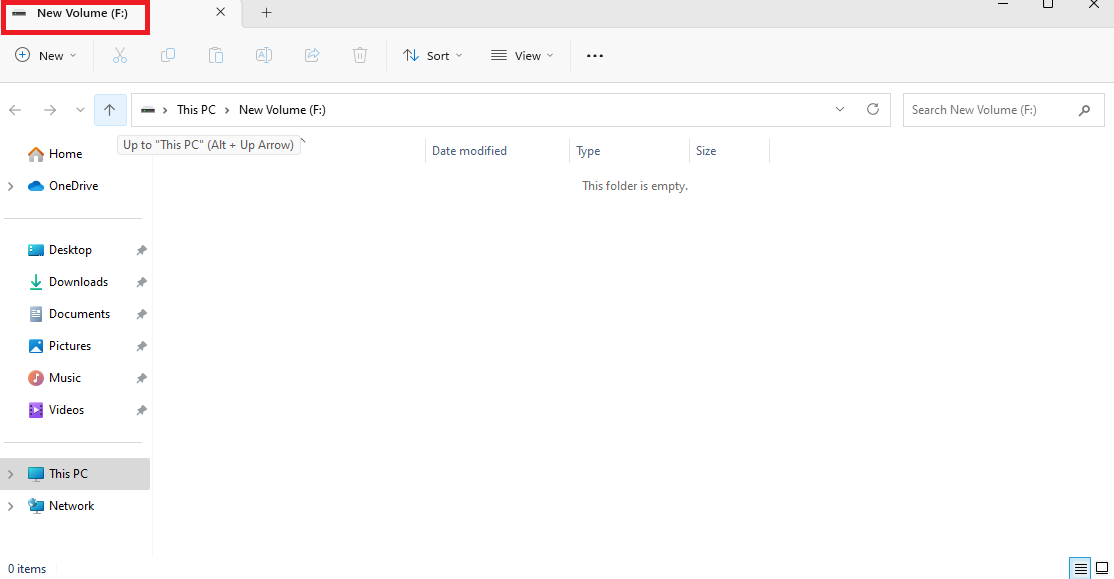
In the new volume highlighted Red, you can see that our new volume has been initialized.
Click on your new data disk highlighted Orange.
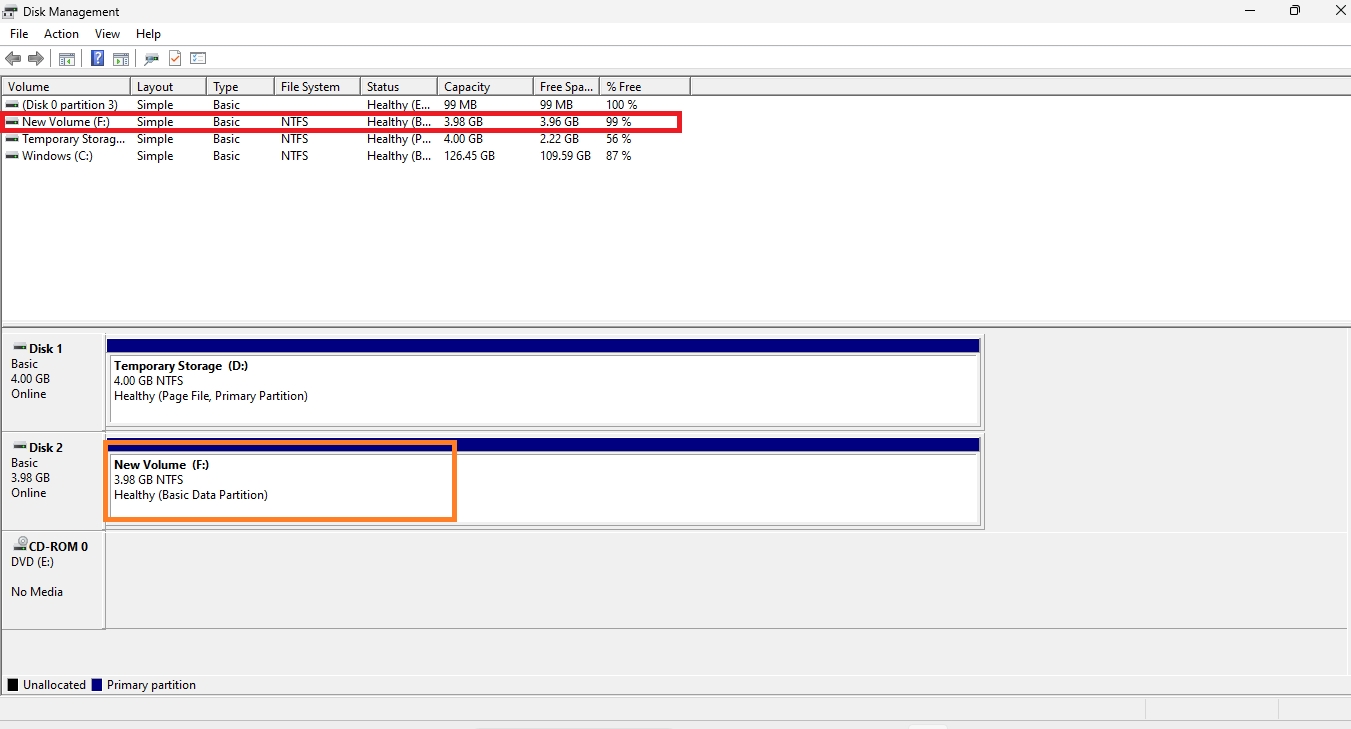
As shown below, our new data disk is available and ready for use.