Achieving High Availability with Virtual Machine Scale Sets

I am a Cloud Developer documenting my cloud journey one day at a time.
Introduction
Virtual Machine Scale Sets are used to run multiple instances of an application. In the event of any issues, customers can seamlessly access the application through one of the alternative instances, resulting in minimal disruption.
By using Virtual Machine Scale Sets, we can create large-scale services such as computing, managing big data, and running container workloads. Depending on the type of images used, a Scale Set can have anywhere from 0 to 1000 VMs with platform images or 0 to 600 VMs with custom images.
What is a Load Balancer?
A load balancer acts as a central point of access which evenly distributes incoming requests or traffic from users to the multiple instances within the scale set.
Let's use the Netflix website as an example. This streaming App has millions of users around the world, when an overwhelming request is made by users to access the site, the load balancer queues this request and evenly distributes it across the virtual machines. To read more about load balancer see Azure Load Balancer.

In this blog post, I have put together a step-by-step guide on setting up your own Virtual Machine Scale Sets in three zones for high availability. Additionally, I have included instructions on creating a Load balancer and a scaling policy. To begin, please refer to the following instructions and get started with creating your Scale Sets.
As a prerequisite, if you do not have a subscription, go to the Azure portal to create a free account. Login into the Azure Console with your email and password to get started
CREATE YOUR VIRTUAL MACHINE SCALE SETS
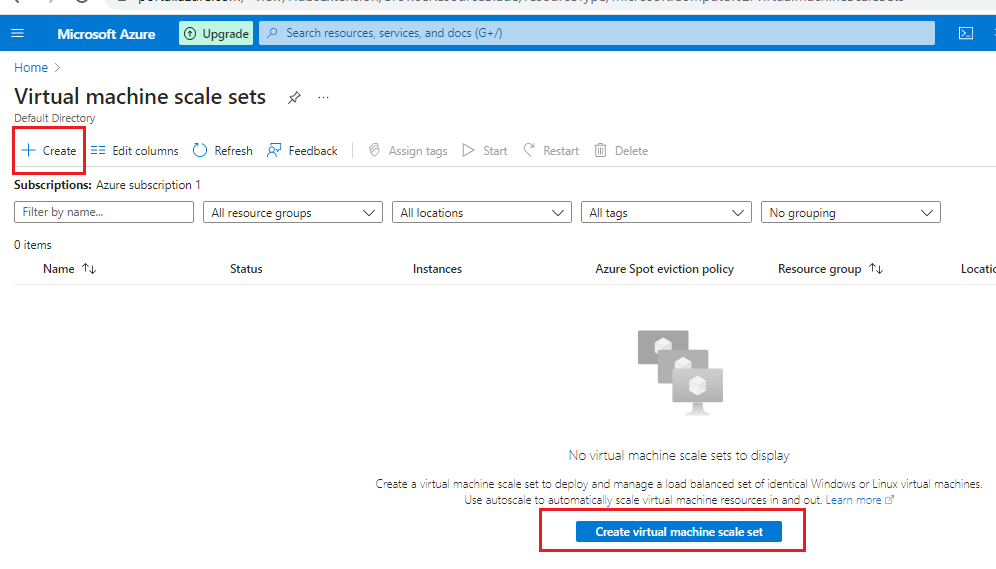
ai). In the search bar, type "Virtual Machine Scale Set"
ii). From the search results, select "Virtual Machine Scale Set" from the list of resources shown
iii). Click on the "Create" button
bi) You will be directed to the "Basics" page.
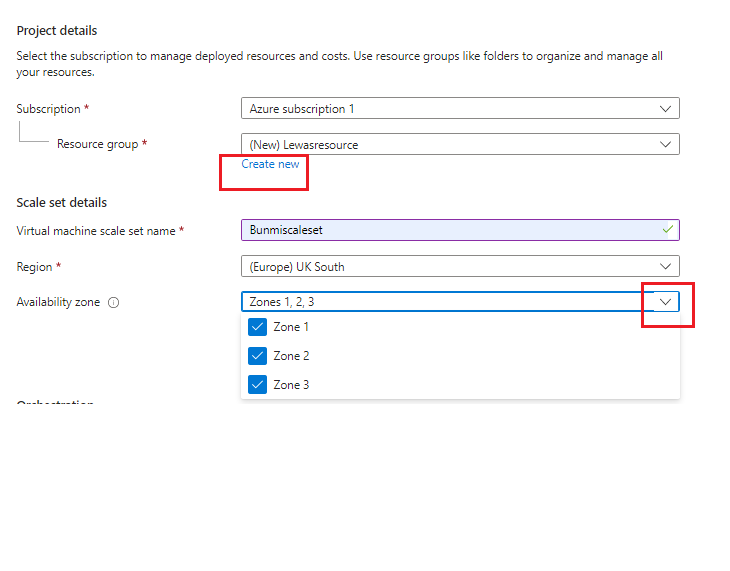
ii) On the project details category, choose your subscription and your existing resource group or create a new one.
iii)On the Scale set details, Provide a name for your virtual machine Scale Set.
iv.) Select the region where you want your virtual machine to be located.
v) For high availability, select Zone 1,2,3. For instance, if there is a failure in Zone 1, the other virtual machines can run in the other zones without disruption.
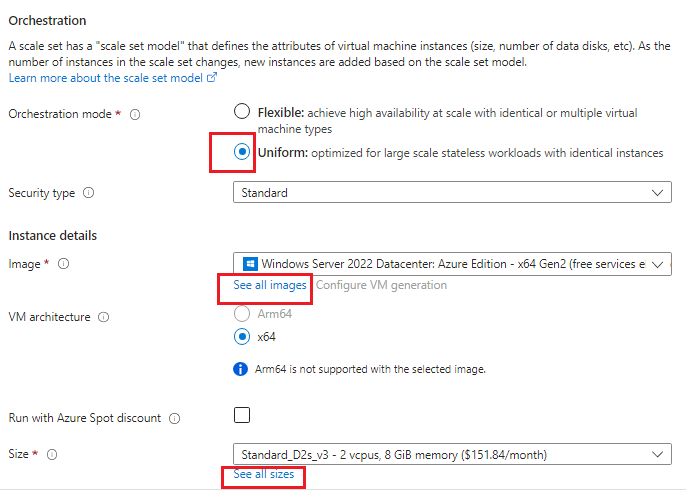
ci)For the Orchestration mode, choose "uniform". This means that when it spins up a new instance, it's going to automatically deconfigure the same as all the previous instances.
ii)For the security type, click on the dropdown menu to select "Standard"
iii.) In the image section, select the windows server 2022 Datacenter: Azure Edition-x64 Gen2 (free service eligible) or click see all image to select your choice
v.) Click on the drop-down to select the size of your instance or see all sizes.
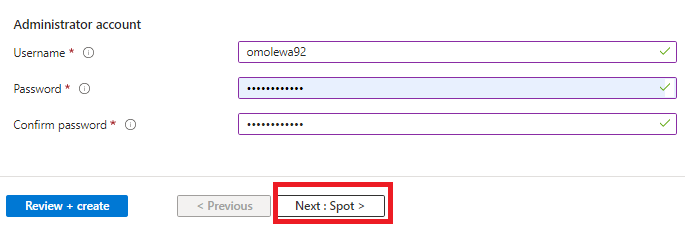
di.) In the administrator account section, provide a username and password.
ii) Click on "Next: Spot>" to direct you to the Spot page.
e) Leave the Spot page in its default state. Click on "Next: Disks>" to direct you to the Disk page
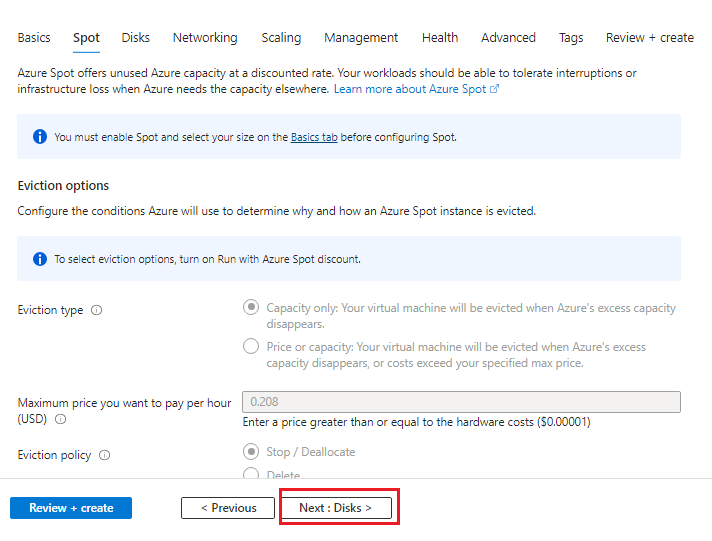
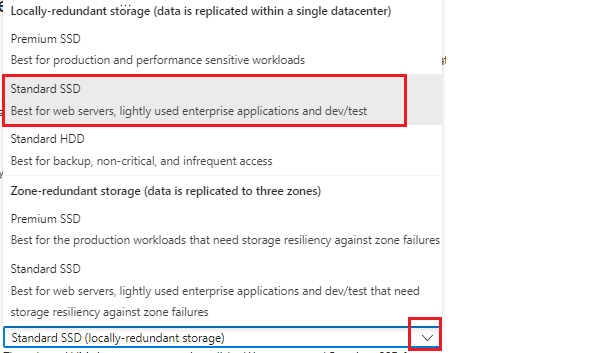
f) On the Disk page, scroll down to "OS disk" and click on the drop-down to select your choice. Leave the other categories as default and move to the next page which is the "networking" page

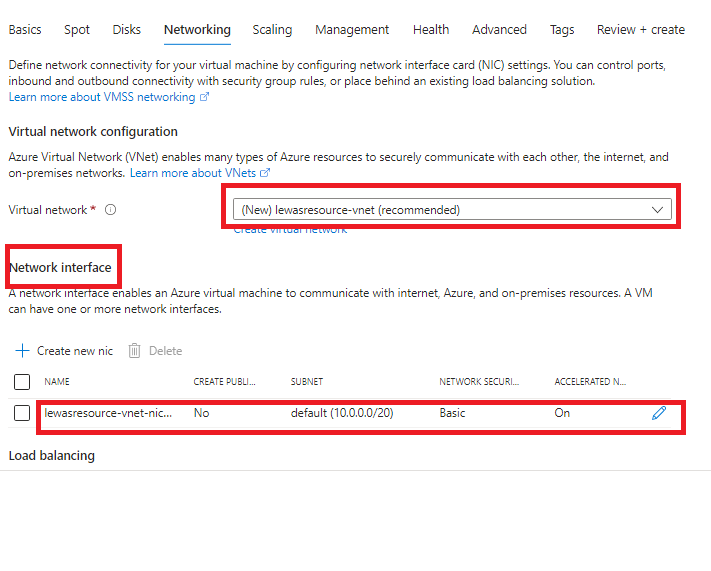
gi) Your virtual network has been created by default.
ii) Scroll down to "Network interface" and click on your default network to edit.
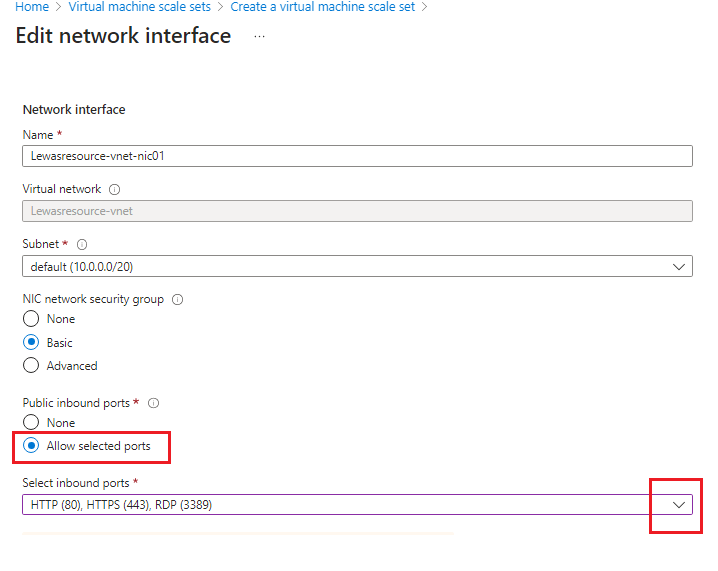
hi)On the Edit network interface page, scroll down to "inbound port". Select allow "selected port"
ii) Go to select inbound port, click on the drop-down, HTTP(80) for web server, HTTPS (443) and RDP(3389) for remote desktop access
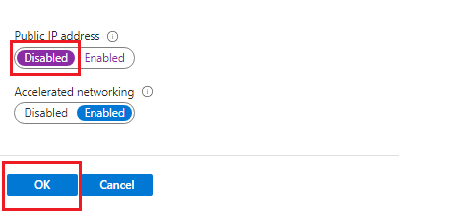
Ii) Scroll down to the Public IP address to "Disable" your public IP address.
ii)Click the "ok" button
ji) Go back to the Networking Page to continue. Go to Load balancing and select Azure load balancer as your load balancing option.
ii) Create your load balancer by clicking on "Create a load balancer"

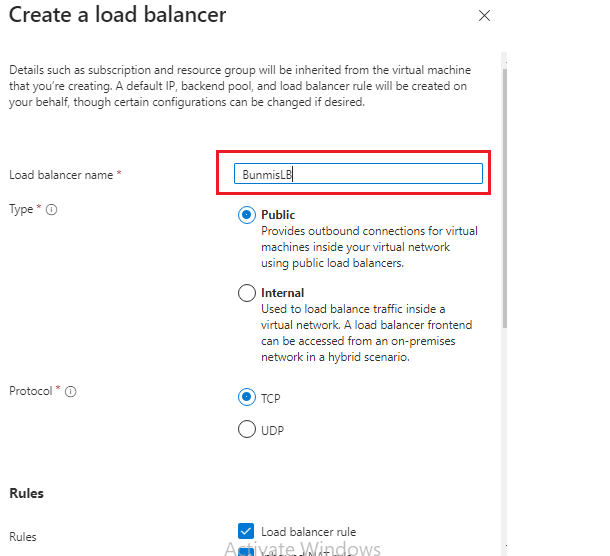
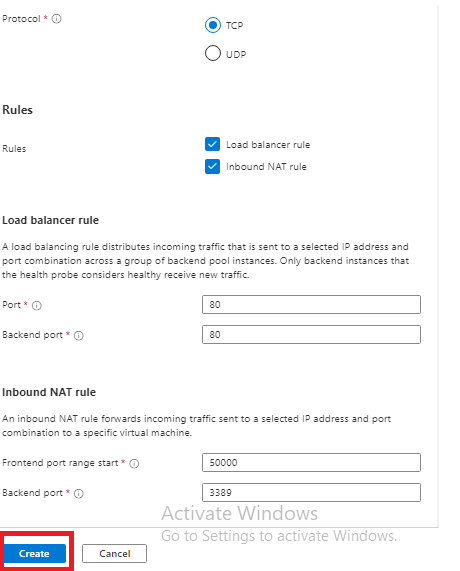
k) On the Create a load balancer page, give it a name and retain it in its default state
L) Click on Create to return to the Networking page. Click on "Next: Scaling>"
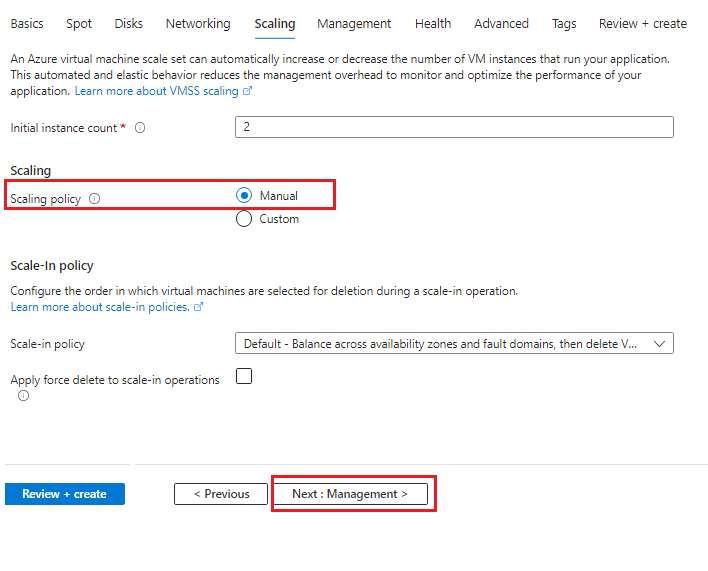
mi) On the Scaling Page, input 2 has its initial instance count.
ii) Select the Manual option as the scaling policy. I Choose "Manual" for its scaling policy to have a good understanding of scaling policy.
iii) Click on "Next: Management>"
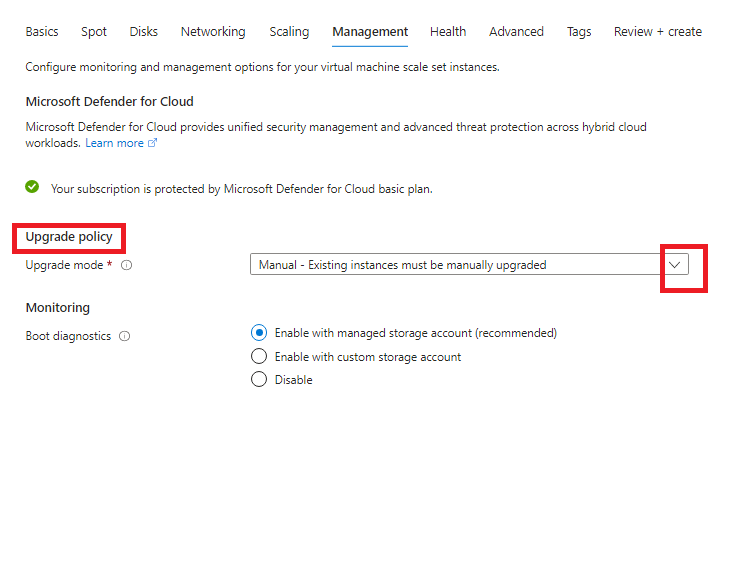
n.i) On Upgrade policy, click on the drop-down to select your upgrade mode
ii) Leave the page in its default state and click "Create +review"
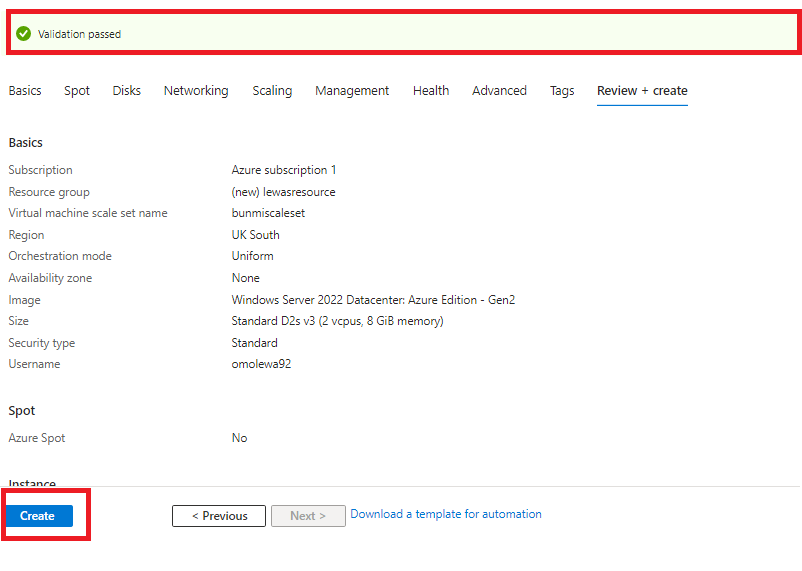
o) Once validation is passed, click on "Create"
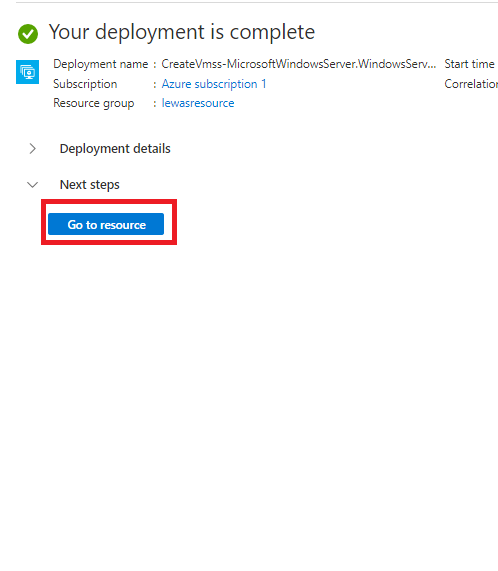
p) Your resources will begin to deploy. Once deployment is complete, click on "Go to resource"
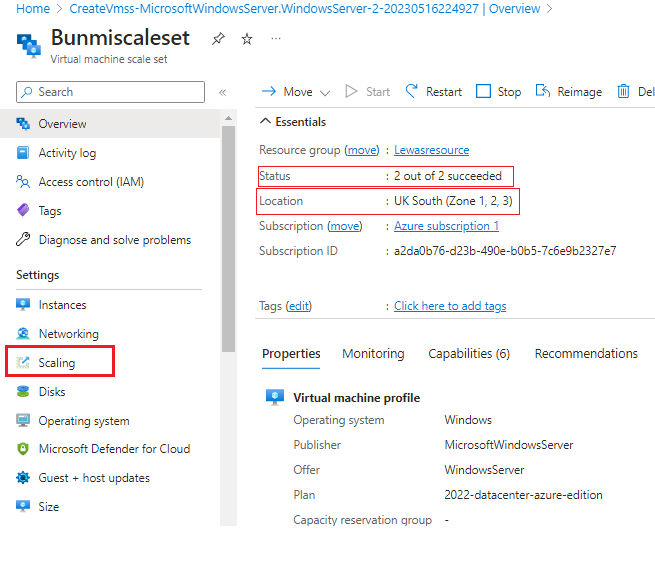
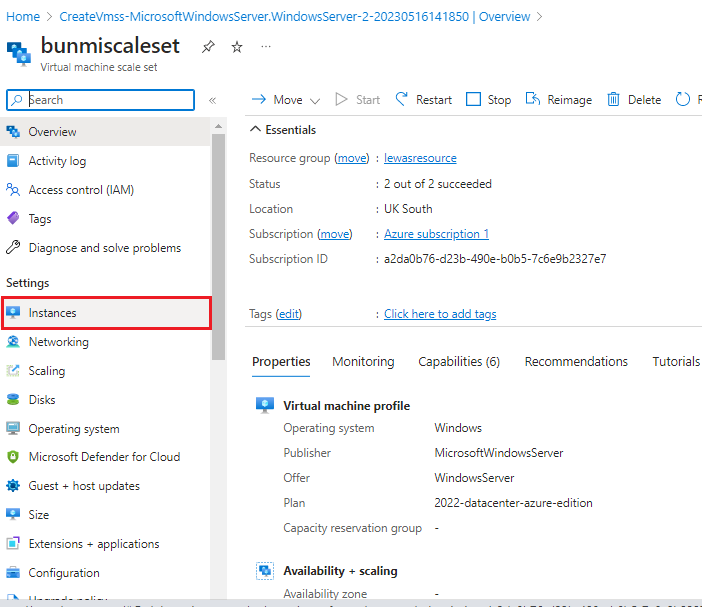
q i)Your Virtual Machine Scale set is running. From the image below, we can see two initial instances are running.
ii)You can click on "Instance" at the left side of the page to view your virtual machines
iii)Click on your virtual machine scale set to see its overview.

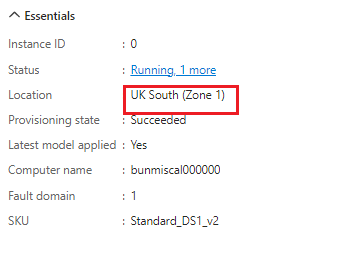
Ri)From the overview page, we can see the location of the virtual machines and their initial instance status
Scaling Policy
a)On Settings at the left side of the page, click "Scaling"
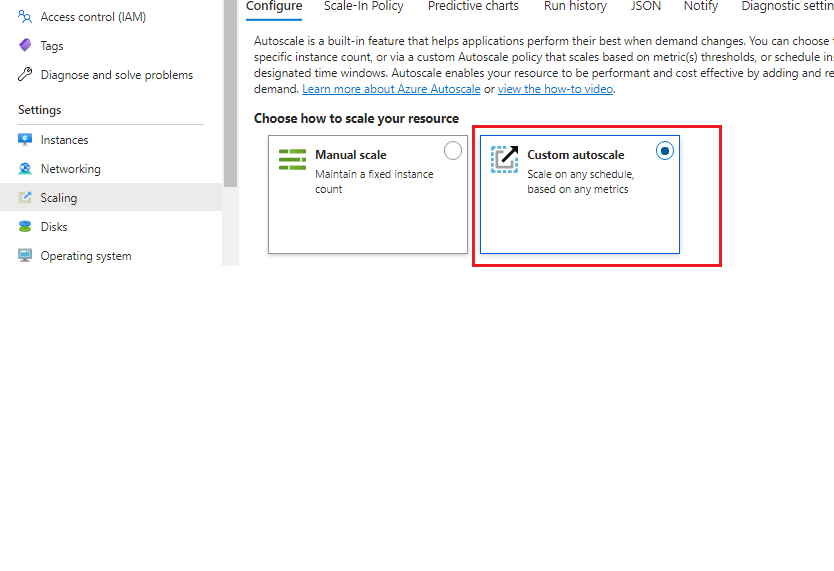
b) Click on "Custom autoscale" to change your scaling policy from manual to custom autoscale.
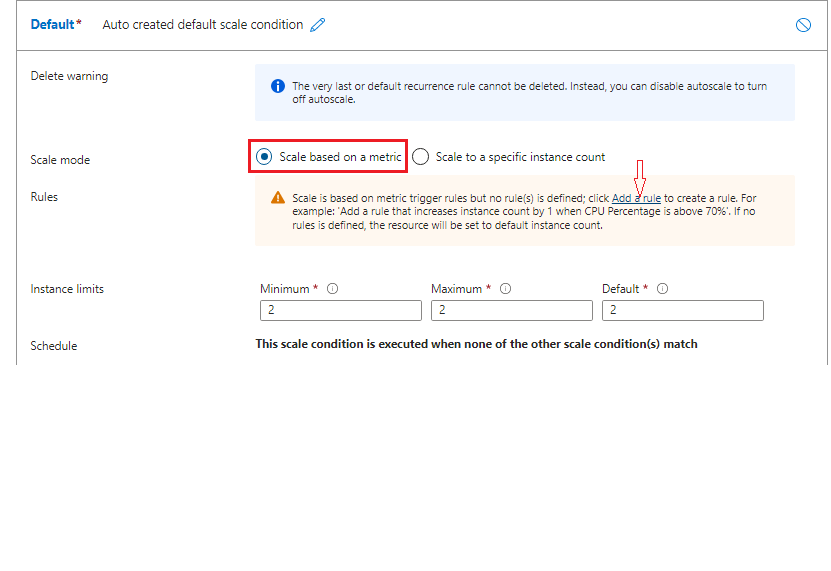
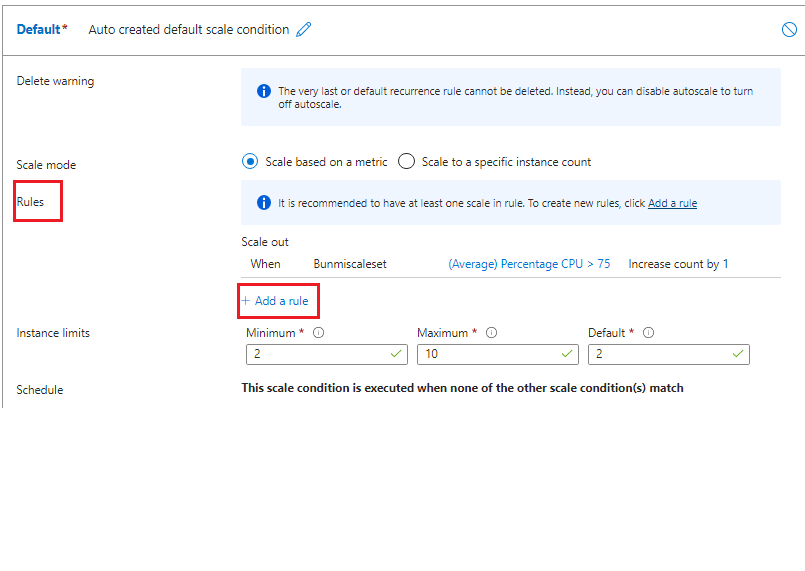
c i)Scroll down to the scale mode to select "Scale based on metric"
ii) On Rules, click on "Add a rule" to create a rule
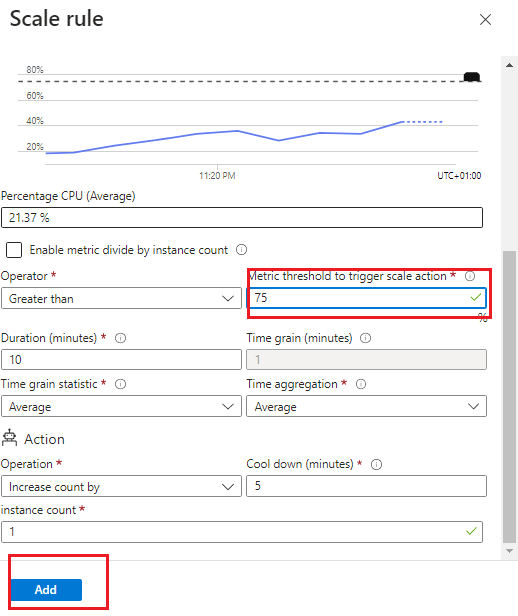
d i) On the Scale rule, scroll down to set the metric threshold to trigger scale action.
ii) This means when the Central Processing Unit(CPU) threshold is maxing out above 75%, there will be scaling out by a virtual machine.
iii) Click "Add" to add the rule
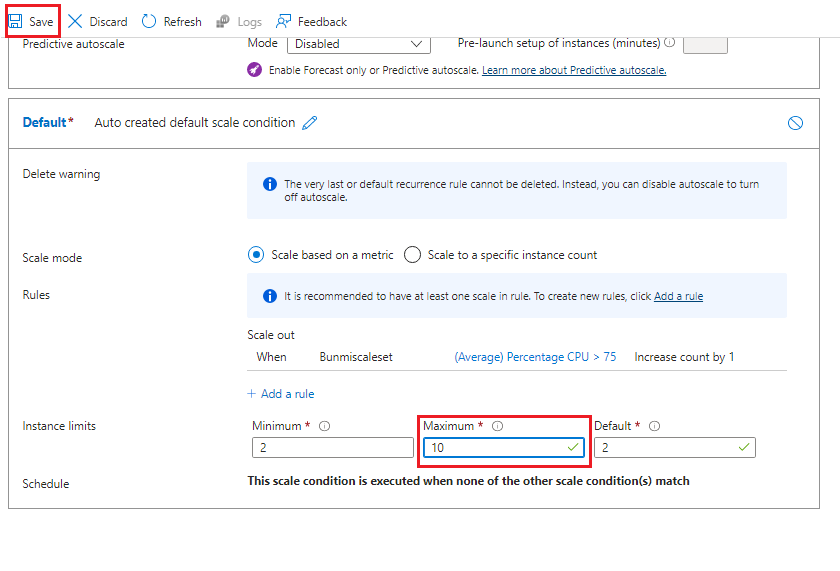
e) If you wish to, increase your instance to a maximum of 10 and click on save
f) To add another rule, click "+Add a rule"
g i) Scroll down to "Criteria", click on the Metric name drop-down, select "Network in Total"
ii) Network in total is the number of bytes (incoming traffic) received on all network interfaces by the Virtual Machine
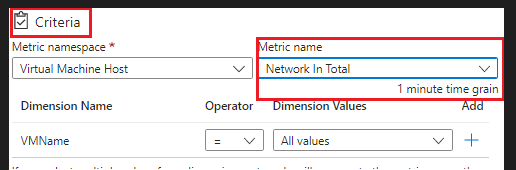
h i) Scroll down and set the "metric threshold to trigger scale action" to 1 byte for 5 minutes.
ii) Change the Duration to 5 minutes and leave the page in its default state. Click add.

I) From the image below, you can see the Rules that you've created.
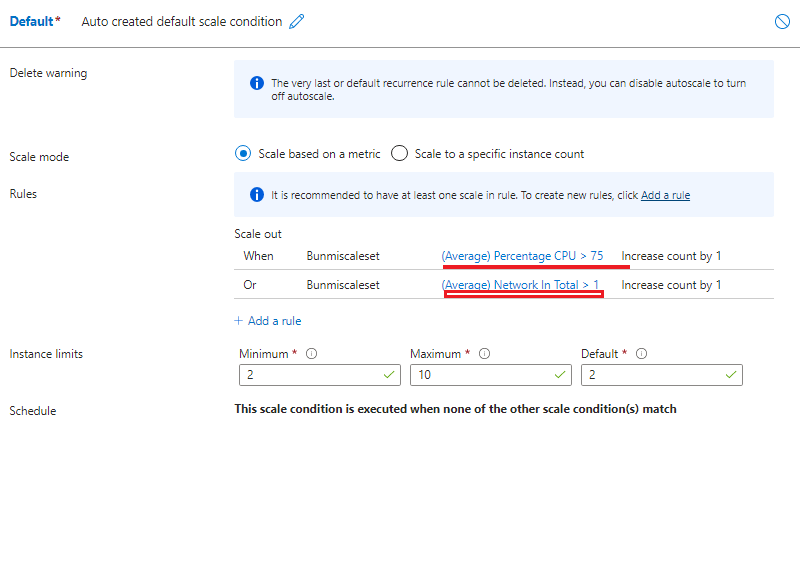
j) Scroll up to the left corner and click Save

k) Once your scaling policy has been saved. Go back to your Virtual Machine scale set overview and click on "Instances" to see your virtual machine.
L) Here you have your initial Virtual machines running successfully.
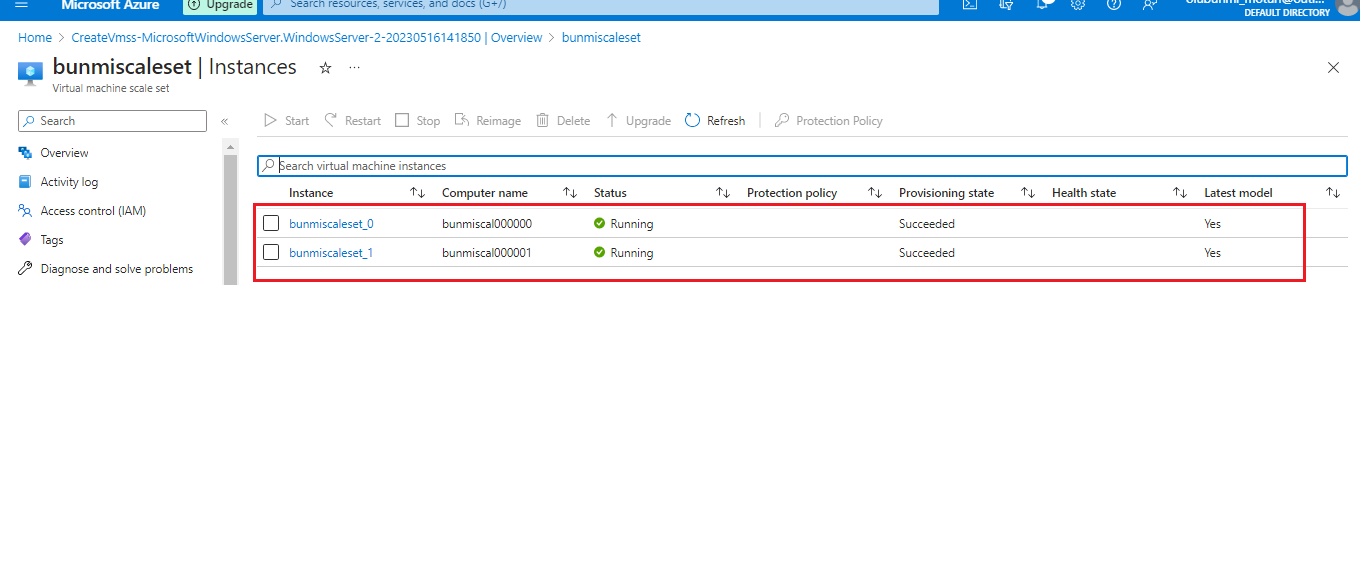
m) If you refresh the page, you will notice your virtual machine has automatically scaled out to three based on our scaling policy.

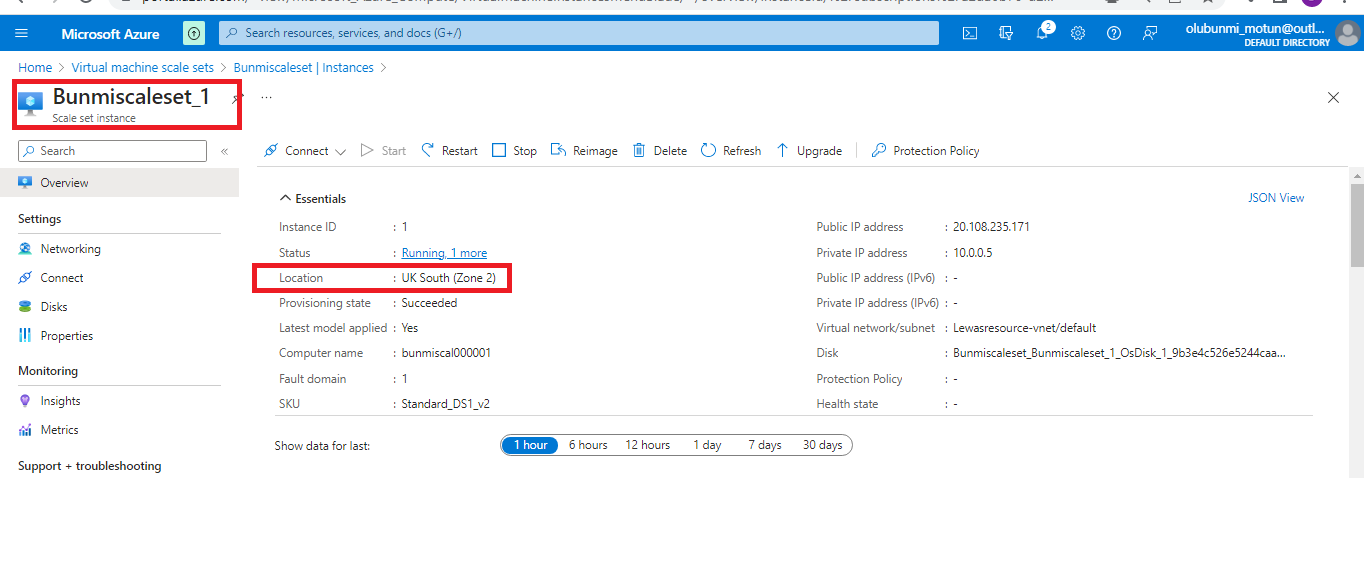
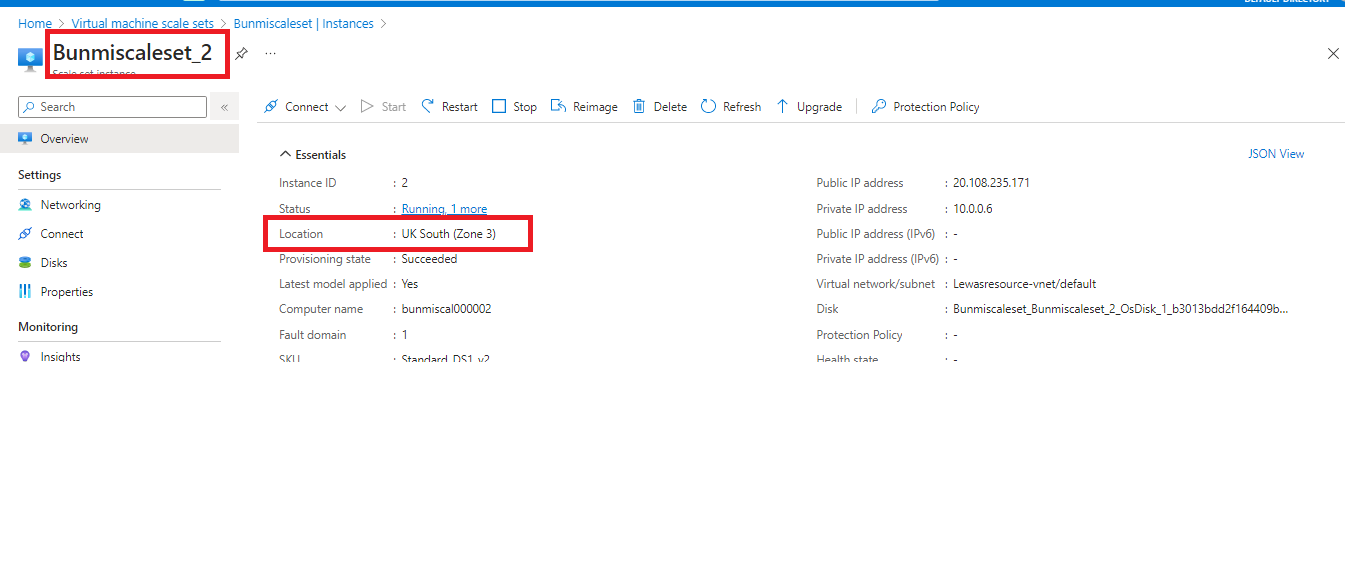
o) Click on any of the virtual machines to view the zones they are located. As mentioned earlier in the blog, this is to ensure the high availability of our virtual machine. Peradventure one zone is down, the other zones can keep on working.

p) The first virtual machine is located in Uk South (Zone 1)
q) The second virtual machine is located in Uk South (Zone 2)
R) The third virtual machine is located in Uk South (Zone 3)
Also note, if the 4th virtual machine spins up, the Zone cycle will start from Zone 1 again.
Delete Your Resources
Once you've achieved the aim with which the Virtual Machine Scale Set was set up, you can delete the resource group, virtual machine Scale Set, and all related resources to avoid unwanted charges.
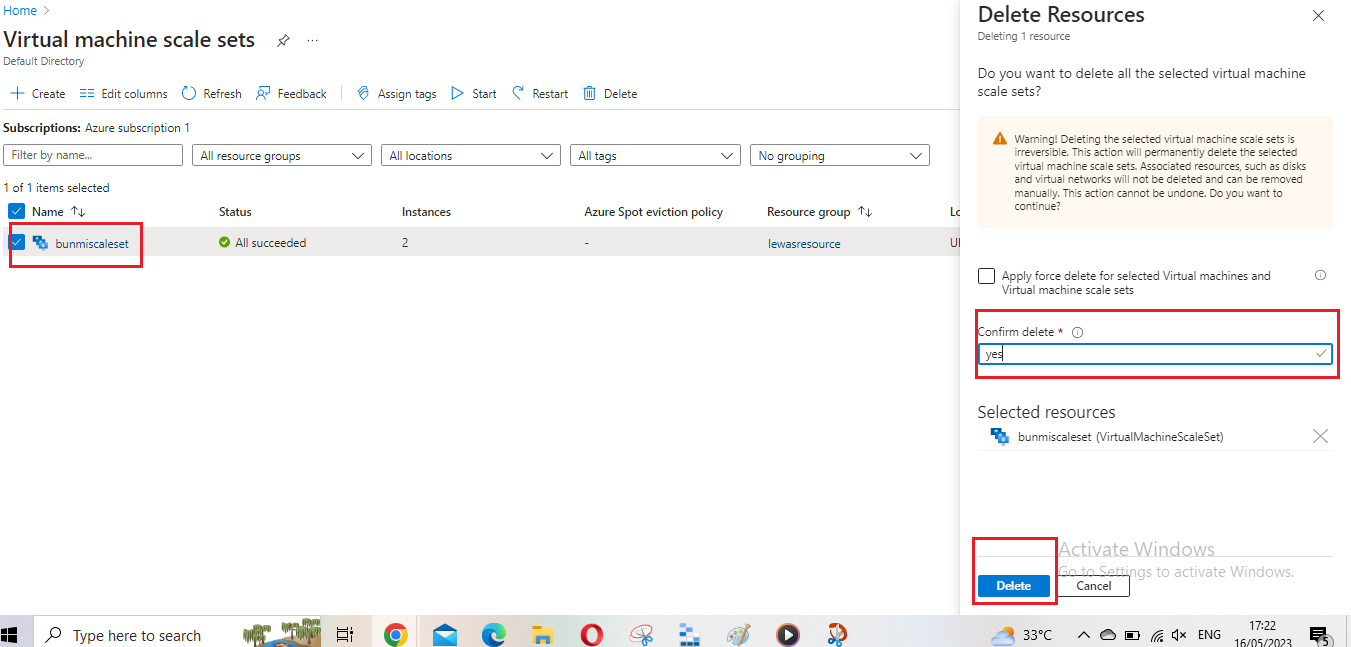
Go to your virtual machine scale sets, tick your scale set box and click on delete at the top of the page.
A "Delete Resources" page will open at the right of the main page
To confirm delete type yes in the box provided and click on delete.
Once you delete it, your virtual machine scale set will no longer be found on the page
To ensure you have completely deleted everything, go to the Azure console, search for Resource group and delete the whole resource group to avoid any unwanted charges.
I hope this article was helpful setting up your highly available Virtual Machine Scale sets. Thank you


