A Guide to Configuring Ping URL Tests and Health Checks with Azure Monitor Application Insights.


In this blog, we briefly explain what Azure Monitor is, then we explore the essential functions of Application Insights, providing clarity on its purpose. We take a deeper dive into differentiating between Azure Log Analytics and Application Insights. Additionally, we explore the concept of availability and how Application Insights offers comprehensive availability tests for our applications.
What is Azure Monitor ?
Microsoft learn documentation described Azure Monitor as;
"a comprehensive monitoring solution for collecting, analyzing, and responding to monitoring data from your cloud and on-premises environments. You can use Azure Monitor to maximize the availability and performance of your applications and services. It helps you understand how your applications are performing and allows you to manually and programmatically respond to system events."
In plain terms, Azure Monitor is the overall monitoring solution provided by Microsoft for Azure services. Within Azure Monitor, you have various tools, and one of them is Application Insights, which is dedicated to helping you understand and optimize the performance of your applications in the Azure cloud
What is Azure Monitor Application Insight
As a deep dive, Application Insights serves as your application's health guardian. It offers insights into how your applications are performing and being utilized. Gain valuable data on performance metrics, user engagement, and retention.
Application Insight also tracks essential details like request and failure rates, response times, popular pages, and user demographics. With features like an application dependency map and performance insights, Application Insights equips you with the tools to master your application's well-being and performance.
Application Insights VS. Azure Log Analytics
While Application Insights is dedicated to application performance insights, Log Analytics user interface in the Azure portal is used for querying the log data collected by Azure Monitor so that you can quickly retrieve, consolidate, and analyze collected data. After creating test queries, you can then directly analyze the data with Azure Monitor tools, or you can save the queries for use with visualizations or alert rules.
Availability Alerts
Application Insights availability sends web requests to your application at regular intervals from points around the world. You can receive alerts if your application isn't responding or if it responds too slowly.
For this demo, we focused on availability. We're going to configure a URL ping test to check our availability and this will send an HTTP request to our Web App URL to see if there's a response. and then we're going to configure an alert based on the results of that test. Lets get started!
Prerequisite
a) Azure Account
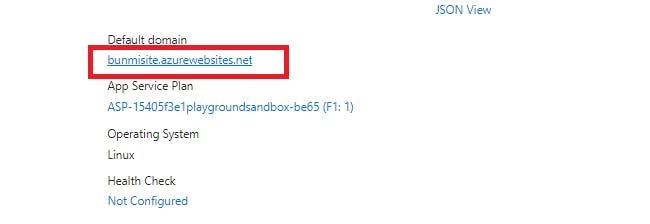
b) An existing Web App URL
Create Application Insight
a) Sign in to the Azure Portal
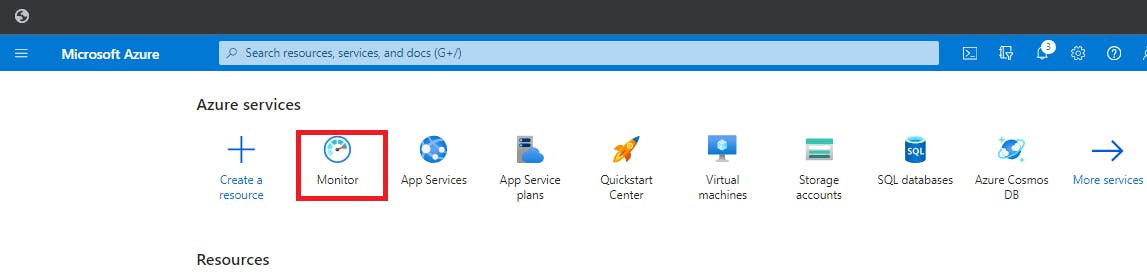
b) Search for Monitor in the search bar
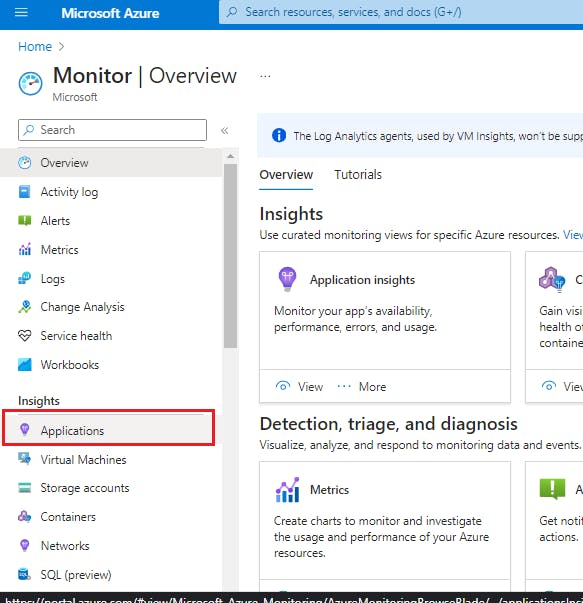
c) Scroll down to insights on the left side of the page and click on Application.
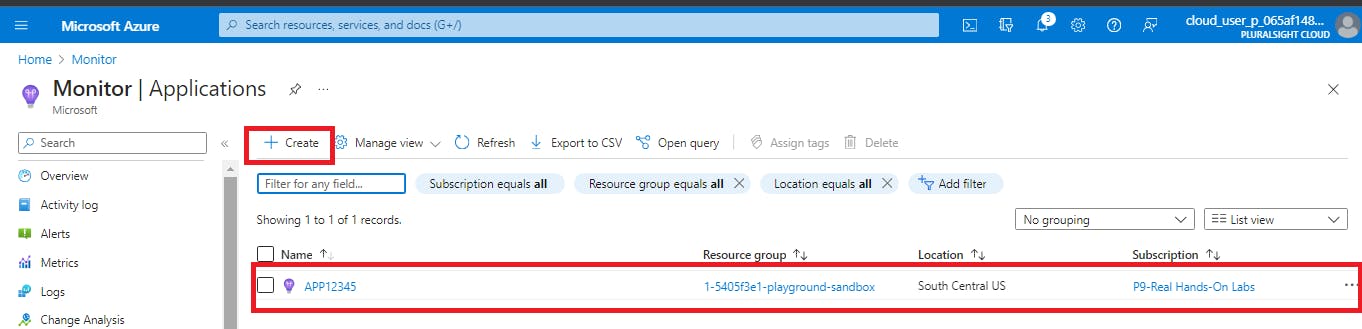
d) Click on the create button to create an Application Insights
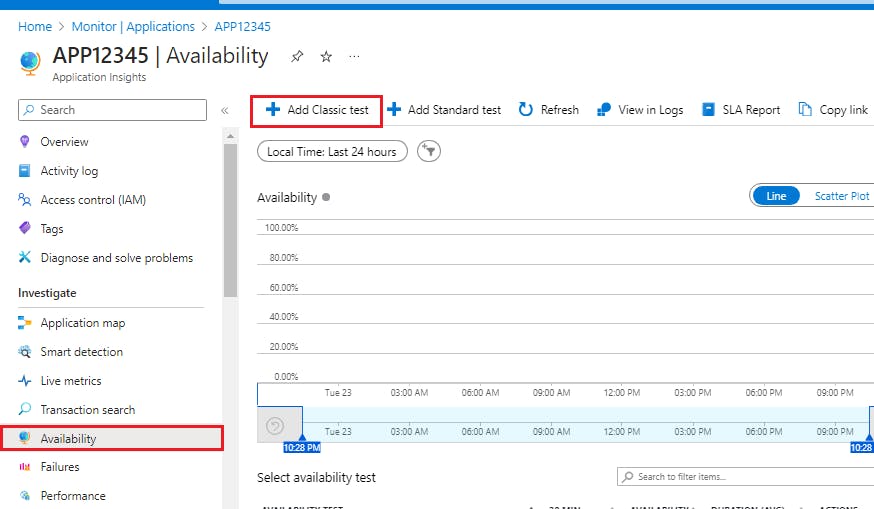
e) Once created, click on it and scroll down to availability at the left side of the page.
f) Click on "Add Classic test" at the top of the page.
g) You will be prompted to create a test. Give your test a name, select the URL ping option for SKU and paste the url of your web App on the URL space. You can set your test frequency to 5, 10 or 15 minutes based on your preference.

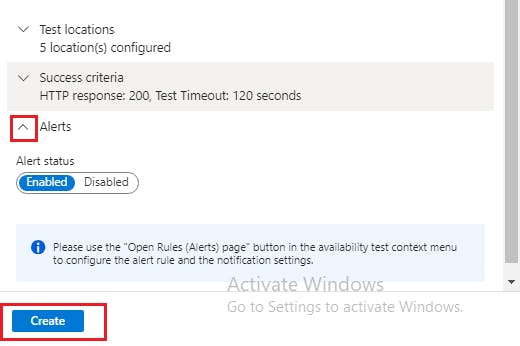
h)When you scroll down, you have the test locations, success criteria and the alerts which is enabled by default
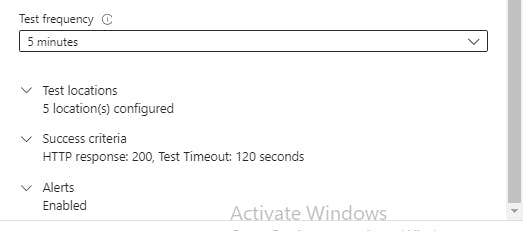
i) To select the locations that we want to run the tests from, we would click on the "Test locations" drop down. Let's keep the defaults which is 5 locations. We have the option of selecting up to 16 different locations as seen below.

j) We will leave the success criteria and Alerts in its default state and click on the create button.
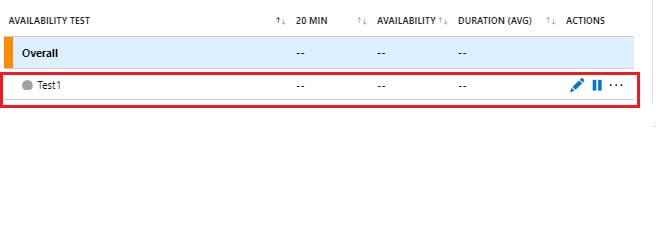
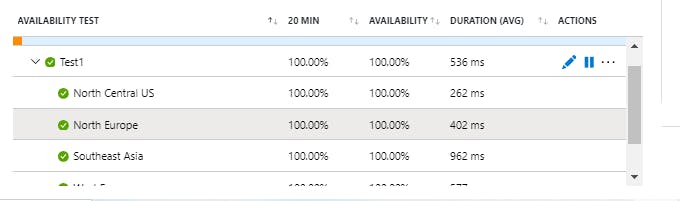
k)From the screenshot below, our test was successfully created.
l) Here you can see that after I refreshed the page, all the test locations have started running.
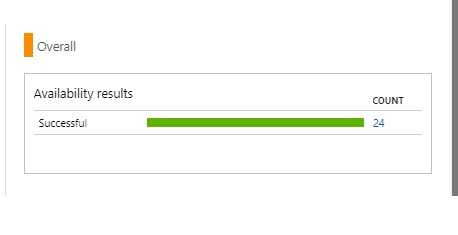
j)We also have the overall availability results count at the left side of the page.
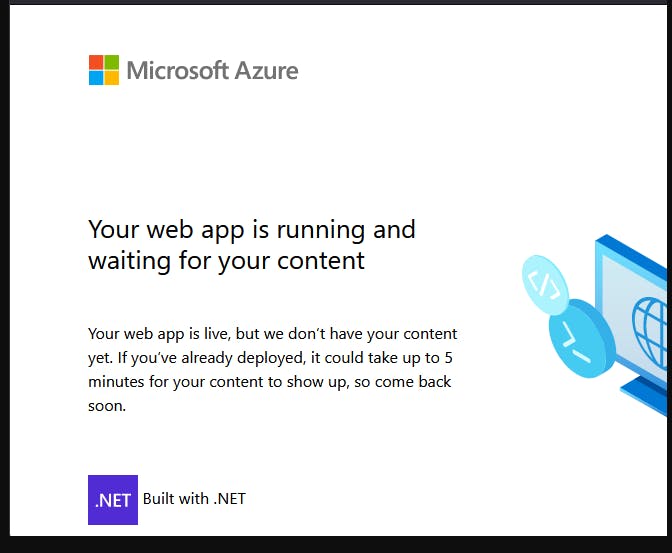
k) We can also see that if open my web App, its in the running state.
Configure an Alert
a) To configure an alert, right-click on the ellipsis

b) Click on the "open Rules (Alerts)page"

c) Click on the Alert rule which has been created by default

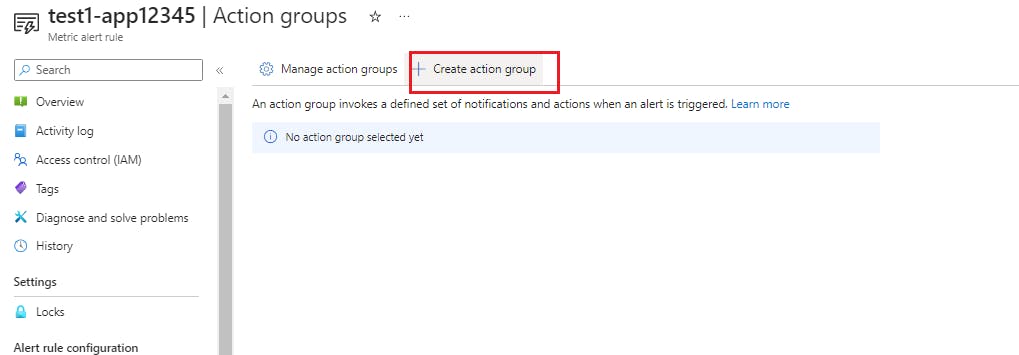
d) Right click on action groups. An action group basically tells the alert who to send the notification to and how.

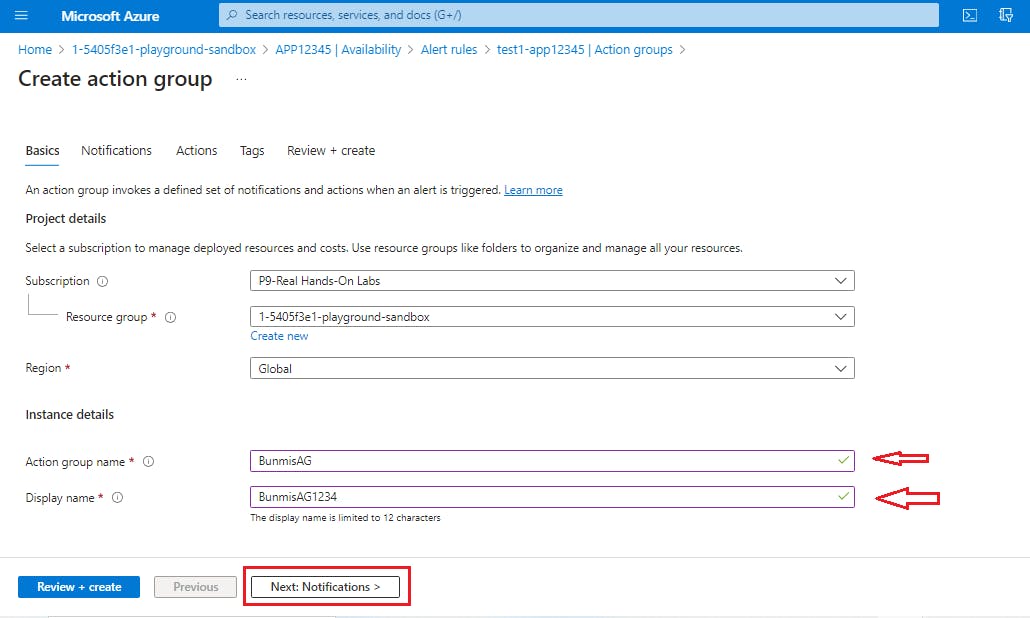
e) Click on Create action group at the top of the page.
f) Select your resource group or create one, name your action group and display name. Click on the "Next: Notification"
g) You can either email the Azure Resource Manager, or you can configure email, SMS, push, or voice.For the purpose of this demo select the "Email/sms/push/voice" notification type. Input the name of who needs to be notified of any alerts.
h)Tick the email box to the left and input the email that needs to be notified. Click the ok button

i) On the "Actions" page, we can select different action types, such as configuring this to an automation runbook, a function, connecting to an ITSM, Logic App, Webhook. But for now, we're going to keep this as just an email notification, and we'll select Next.

j) Go ahead and review and create.

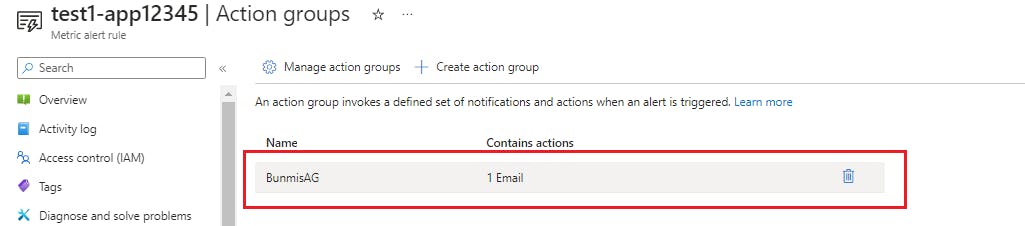
k) We have our action group created as shown below.
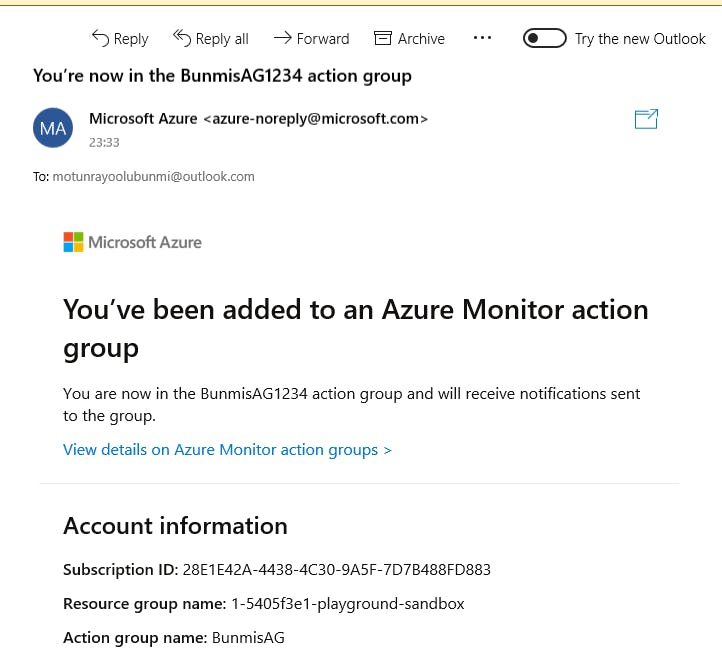
l) As confirmed below, a notification was sent to confirm that this email will recieve alerts from the action group.
Simulate a Failure on your Web App
Lets go ahead and simulate a failure by stopping our Web App
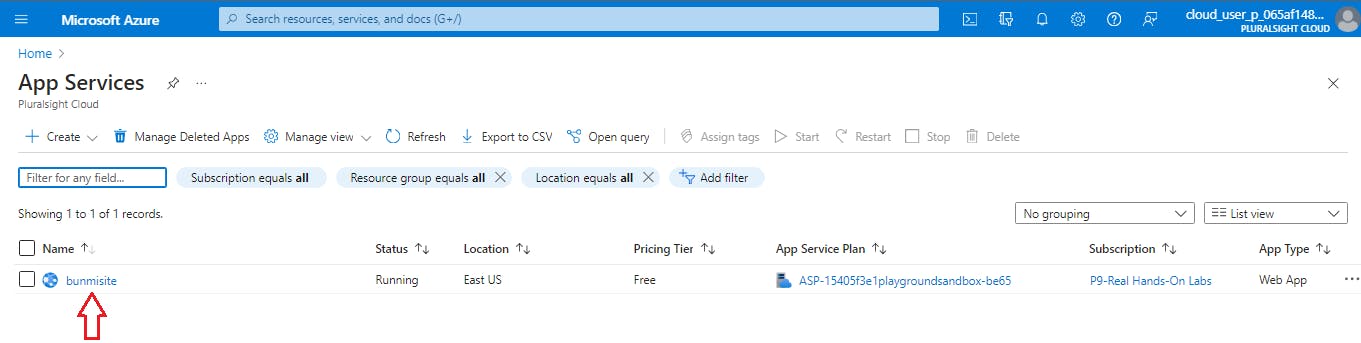
a) Navigate to your existing web App and click on it.
b) Click on the stop button to stop your Web App
c) Ensure you get a notification as shown below that it was stopped successfully.

d) copy your web App Url again and browse to it
e) You will get a 403 error message.

f) Now let's go back to Application Insights and see if the availability test will show us the failure.
So, let's navigate back over to the availability. And because this test runs every 5 minutes, you might not see the failure immediately, so you can keep refreshing until you see the failure

g) Okay, and now that the test has failed in all locations, Motun should recieve an email like this notifying her of the failure.
