If you accidentally deleted your virtual machine, there are methods available for restoring it. Among those methods is the option to restore your virtual machine using its operating system disk.
In this blog post, we will guide you through the process of creating a virtual machine, intentionally deleting it, and then recovering it using its OS disk. Additionally, we will cover the creation and attachment of a data disk to the virtual machine.
However, before diving into the restoration process, it is important to understand the distinction between an OS disk and a data disk.
What is the Difference Between (Operating System) OS Disk and Data Disk?
Azure documentation explains that every virtual machine is equipped with a single (operating system) OS disk that is directly attached to it. This disk comes with a pre-installed operating system that was chosen during the creation of the virtual machine. It serves as the primary storage for the boot volume, essential for initiating the system.
While data disk is a managed disk that is attached to a virtual machine to store application data or other data you need to keep.
It is important to note that both OS disk and data disk cannot be reduced. Reducing disk size is not supported in Azure to prevent data loss.

To increase the size of your OS disk, it must have been unattached or deallocated from the virtual machine. This rule doesn't apply for data disks.

Restoring Your Virtual Machine
To create your virtual machine, see my blog beginners' guide to creating a virtual Machine. Let's get started:
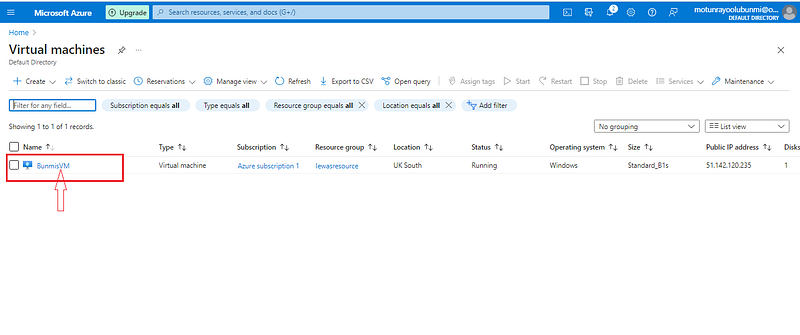
a) Click on the Virtual Machine in the Azure Console.
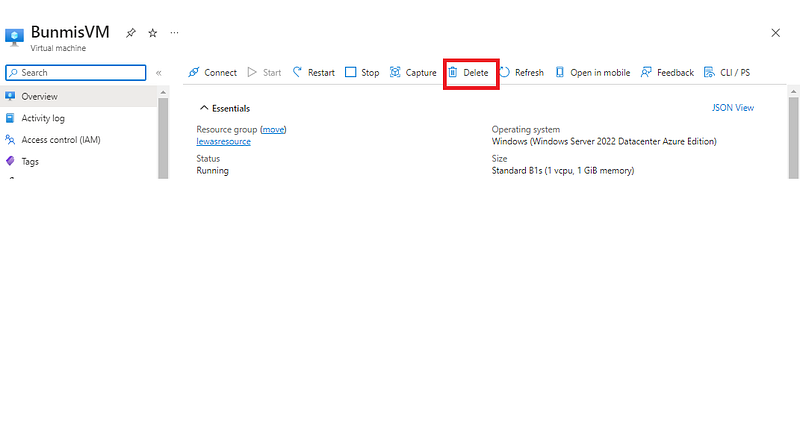
b) Click “delete” to delete your virtual machine
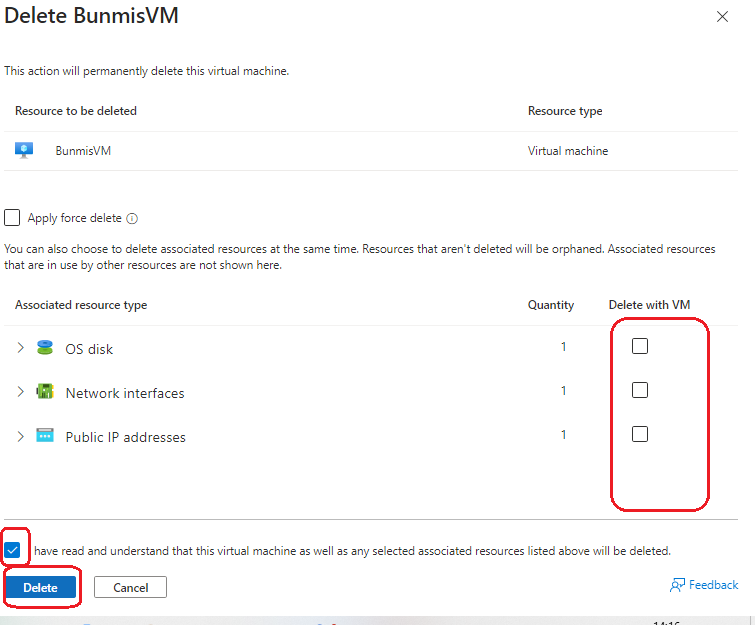
c)On the delete page, uncheck the associated resource and click on the delete button
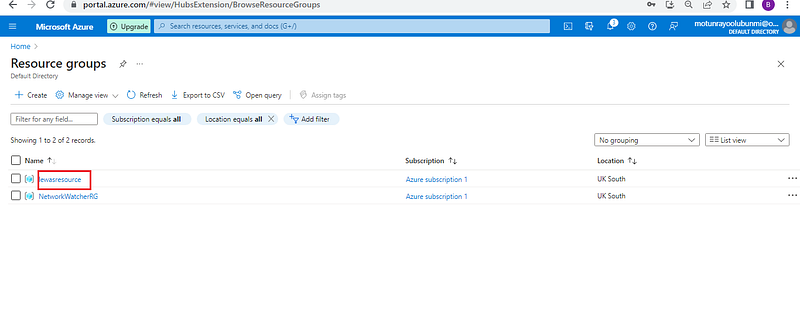
d) Once you’ve ensured that your virtual machine has been deleted, search for the resource group in the console.
e) click on the resource group you assigned to your deleted virtual machine and its resource.
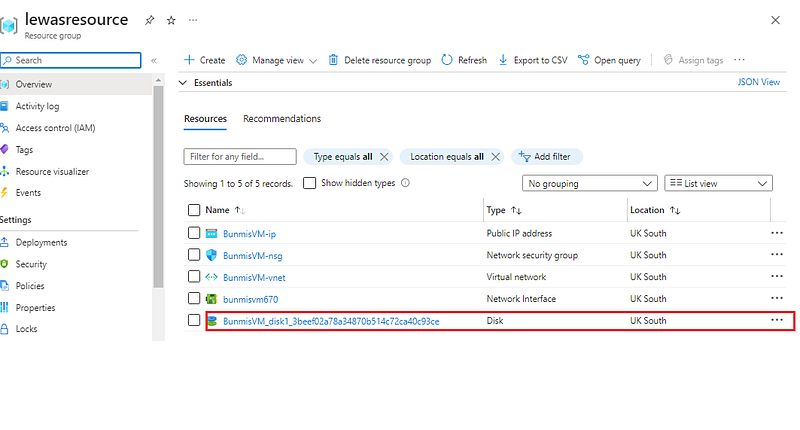
f) Search for the OS Disk of the deleted virtual machine and click on it.
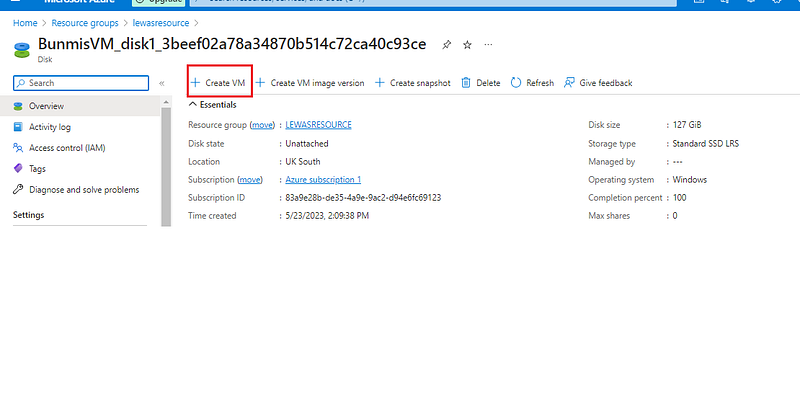
g) On the top left corner of the Disk page, click on “Create VM”
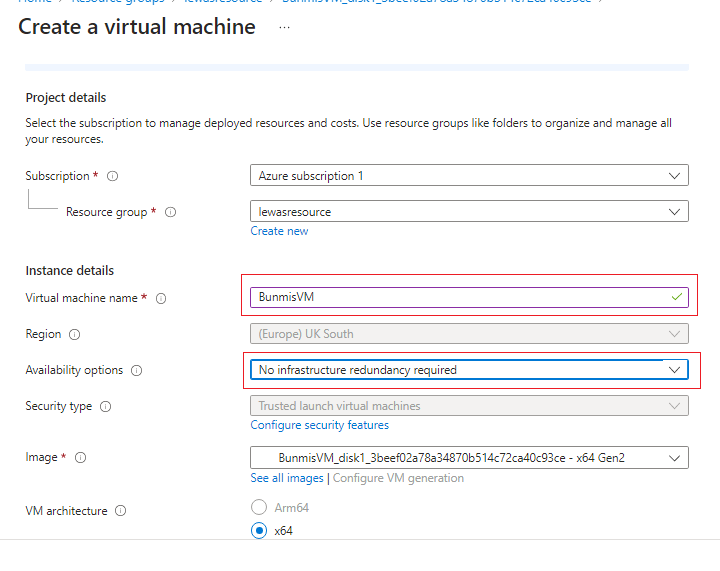
hi) This will direct you to create a virtual machine.
ii) Select your subscription and resource group if you wish to
iii) Give your Virtual Machine a name and select your availability option in the drop-down menu.
Please note: You can not make any changes to your region.
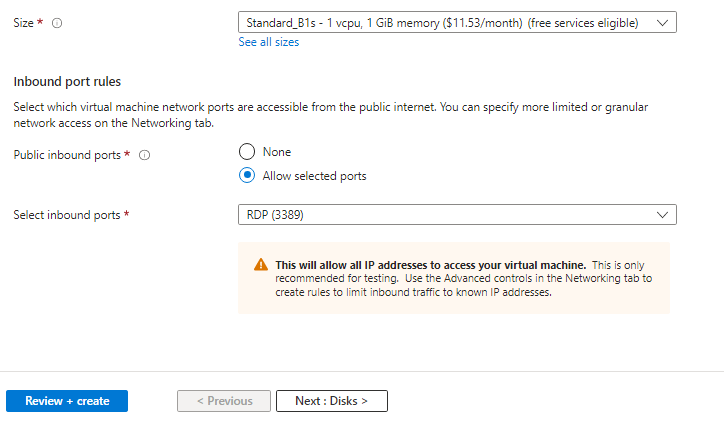
Ii) Select the Size of your virtual machine from the drop-down menu or see all sizes.
ii) select any inbound port depending on the connection route you want to take. Click on “Next: Disk>” to direct you to the disk page.
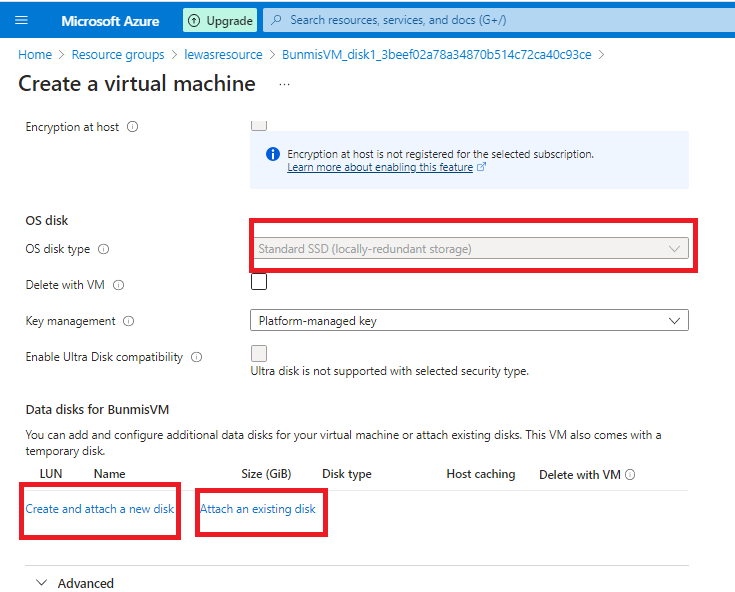
j) On the disk page, scroll down to OS disk, you will notice that you can’t change the disk type. This is because it is an existing OS disk.
ji) Scroll down to the data disk. Create and attach a new data disk or attach an existing data disk. In this demo, I chose to create a new data disk
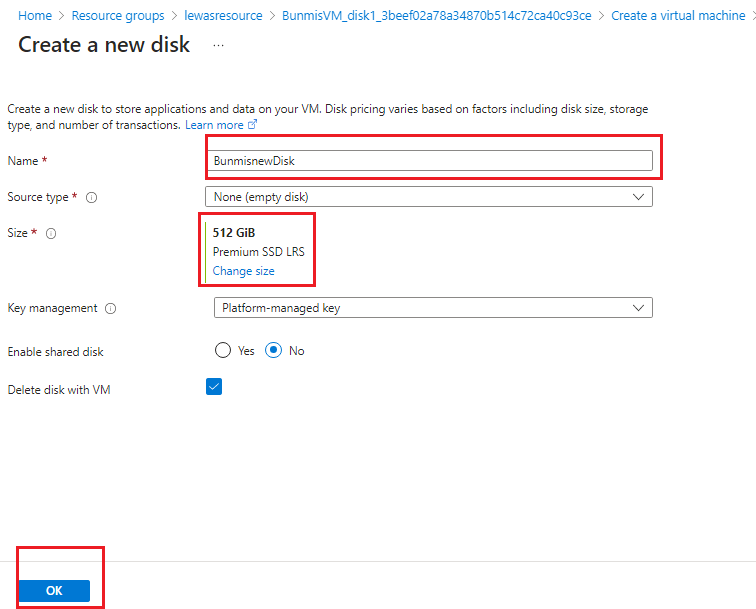
ki) Give your data disk a name and select the source type.
ii) You can change the size of your data disk by clicking “change size” and clicking the “OK” button.
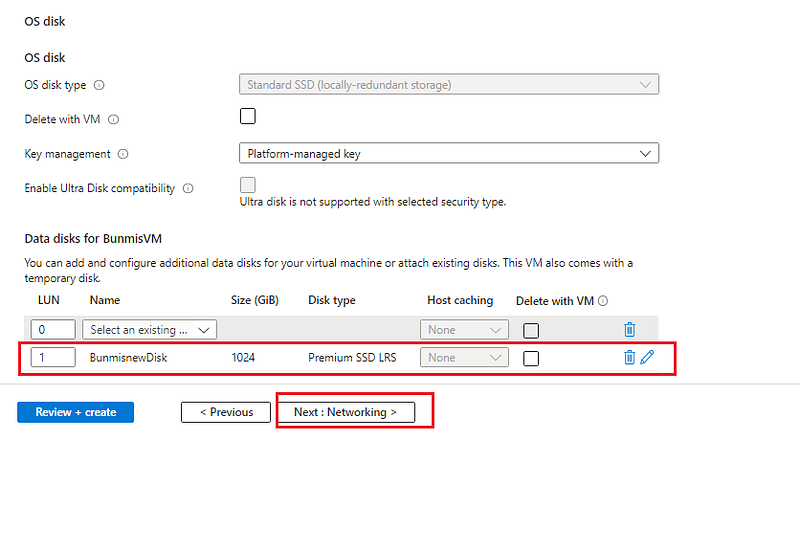
li) There you have your newly created data disk highlighted in the red box
ii) click on “Next: Networking>”
m i) Leave the networking page in its default state. Go to the management page.
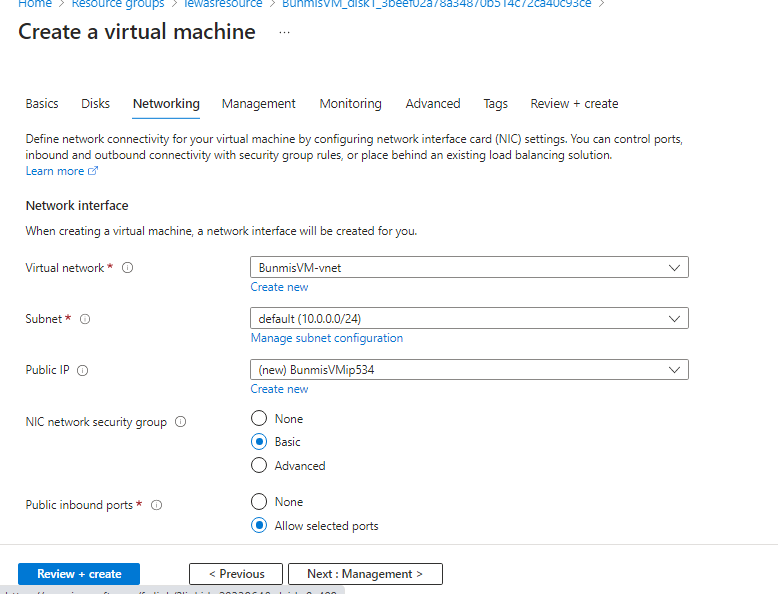
n i) Also, leave the management page in its default state.
ii) You can also take a look at the monitoring, advanced and tags page. For this demo, I’m going to leave them in their default state.
ii)Click on the “Create+review” button
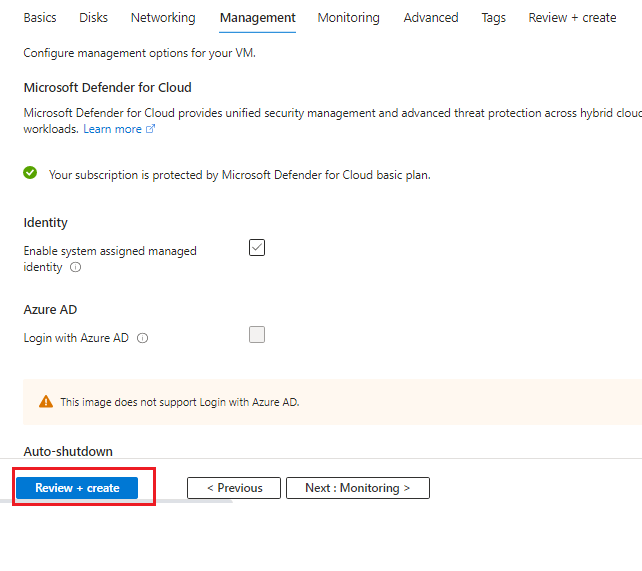
o) Once validation is passed, click on the “Create” button.
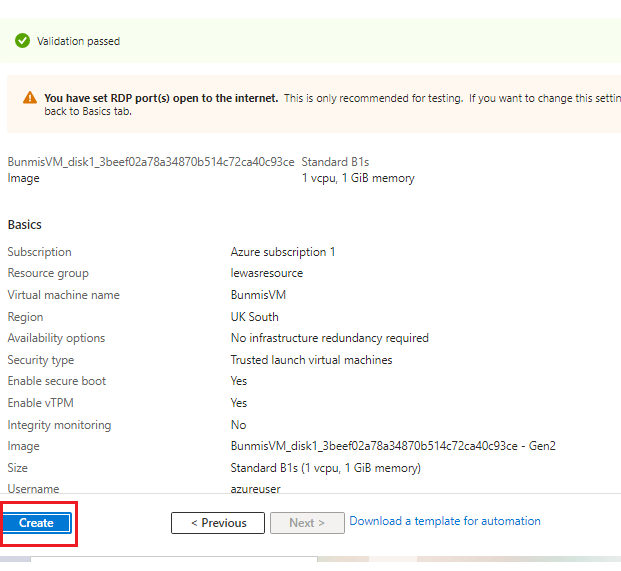
p)Once your deployment is ready, click on “Go to resources”

q i) Your virtual machine is restored!
Now that we've restored our virtual machine, let's get in to view our disk types.
OS Disk and Data Disk
1) To view your disk, click on “Disk” in the middle left corner to view disks
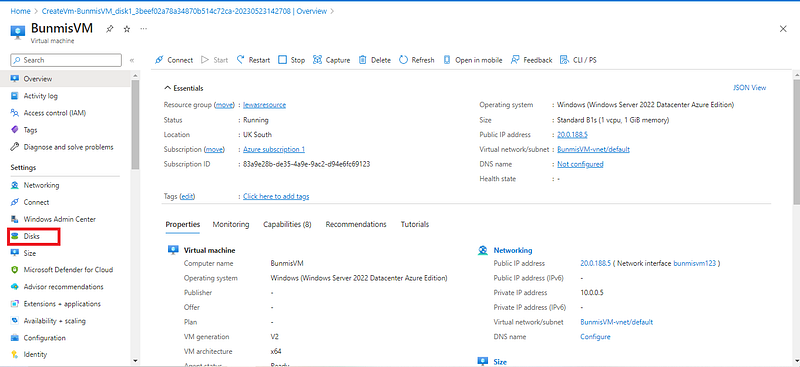
2) We can see that there is a different section for the OS disk and the data disk.
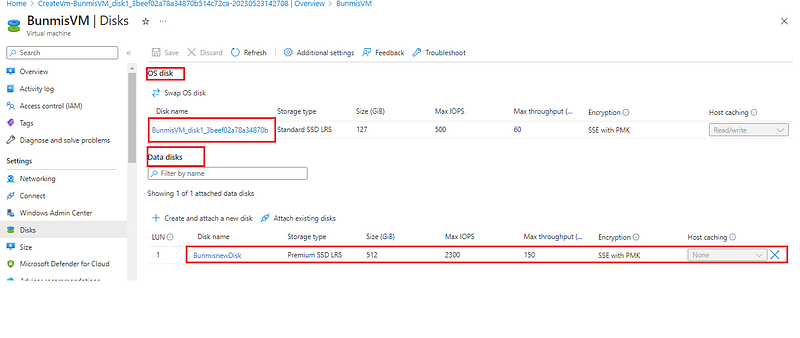
3) You can also view the Disk state by checking from the overview. This shows the disk is attached to the Virtual Machine.

I hope this helped understand how to restore your virtual machine, and how to create and attach your data disk. Thank you.
